I recently had the requirement to save the monthly Dataset of a Power BI Report. I remembered a blog post by Chris Webb on how to use Power Automate to access the Power BI Rest API. The following post describes how I use this to create a monthly PBIX backup.
Register an app for the Power BI APIs
In the first step, we have to register a new application that can access the Power BI APIs of our tenants. I will not describe the process in detail. Take a look at the Microsoft documentation.
The application can be registered on page
https://dev.powerbi.com/apps
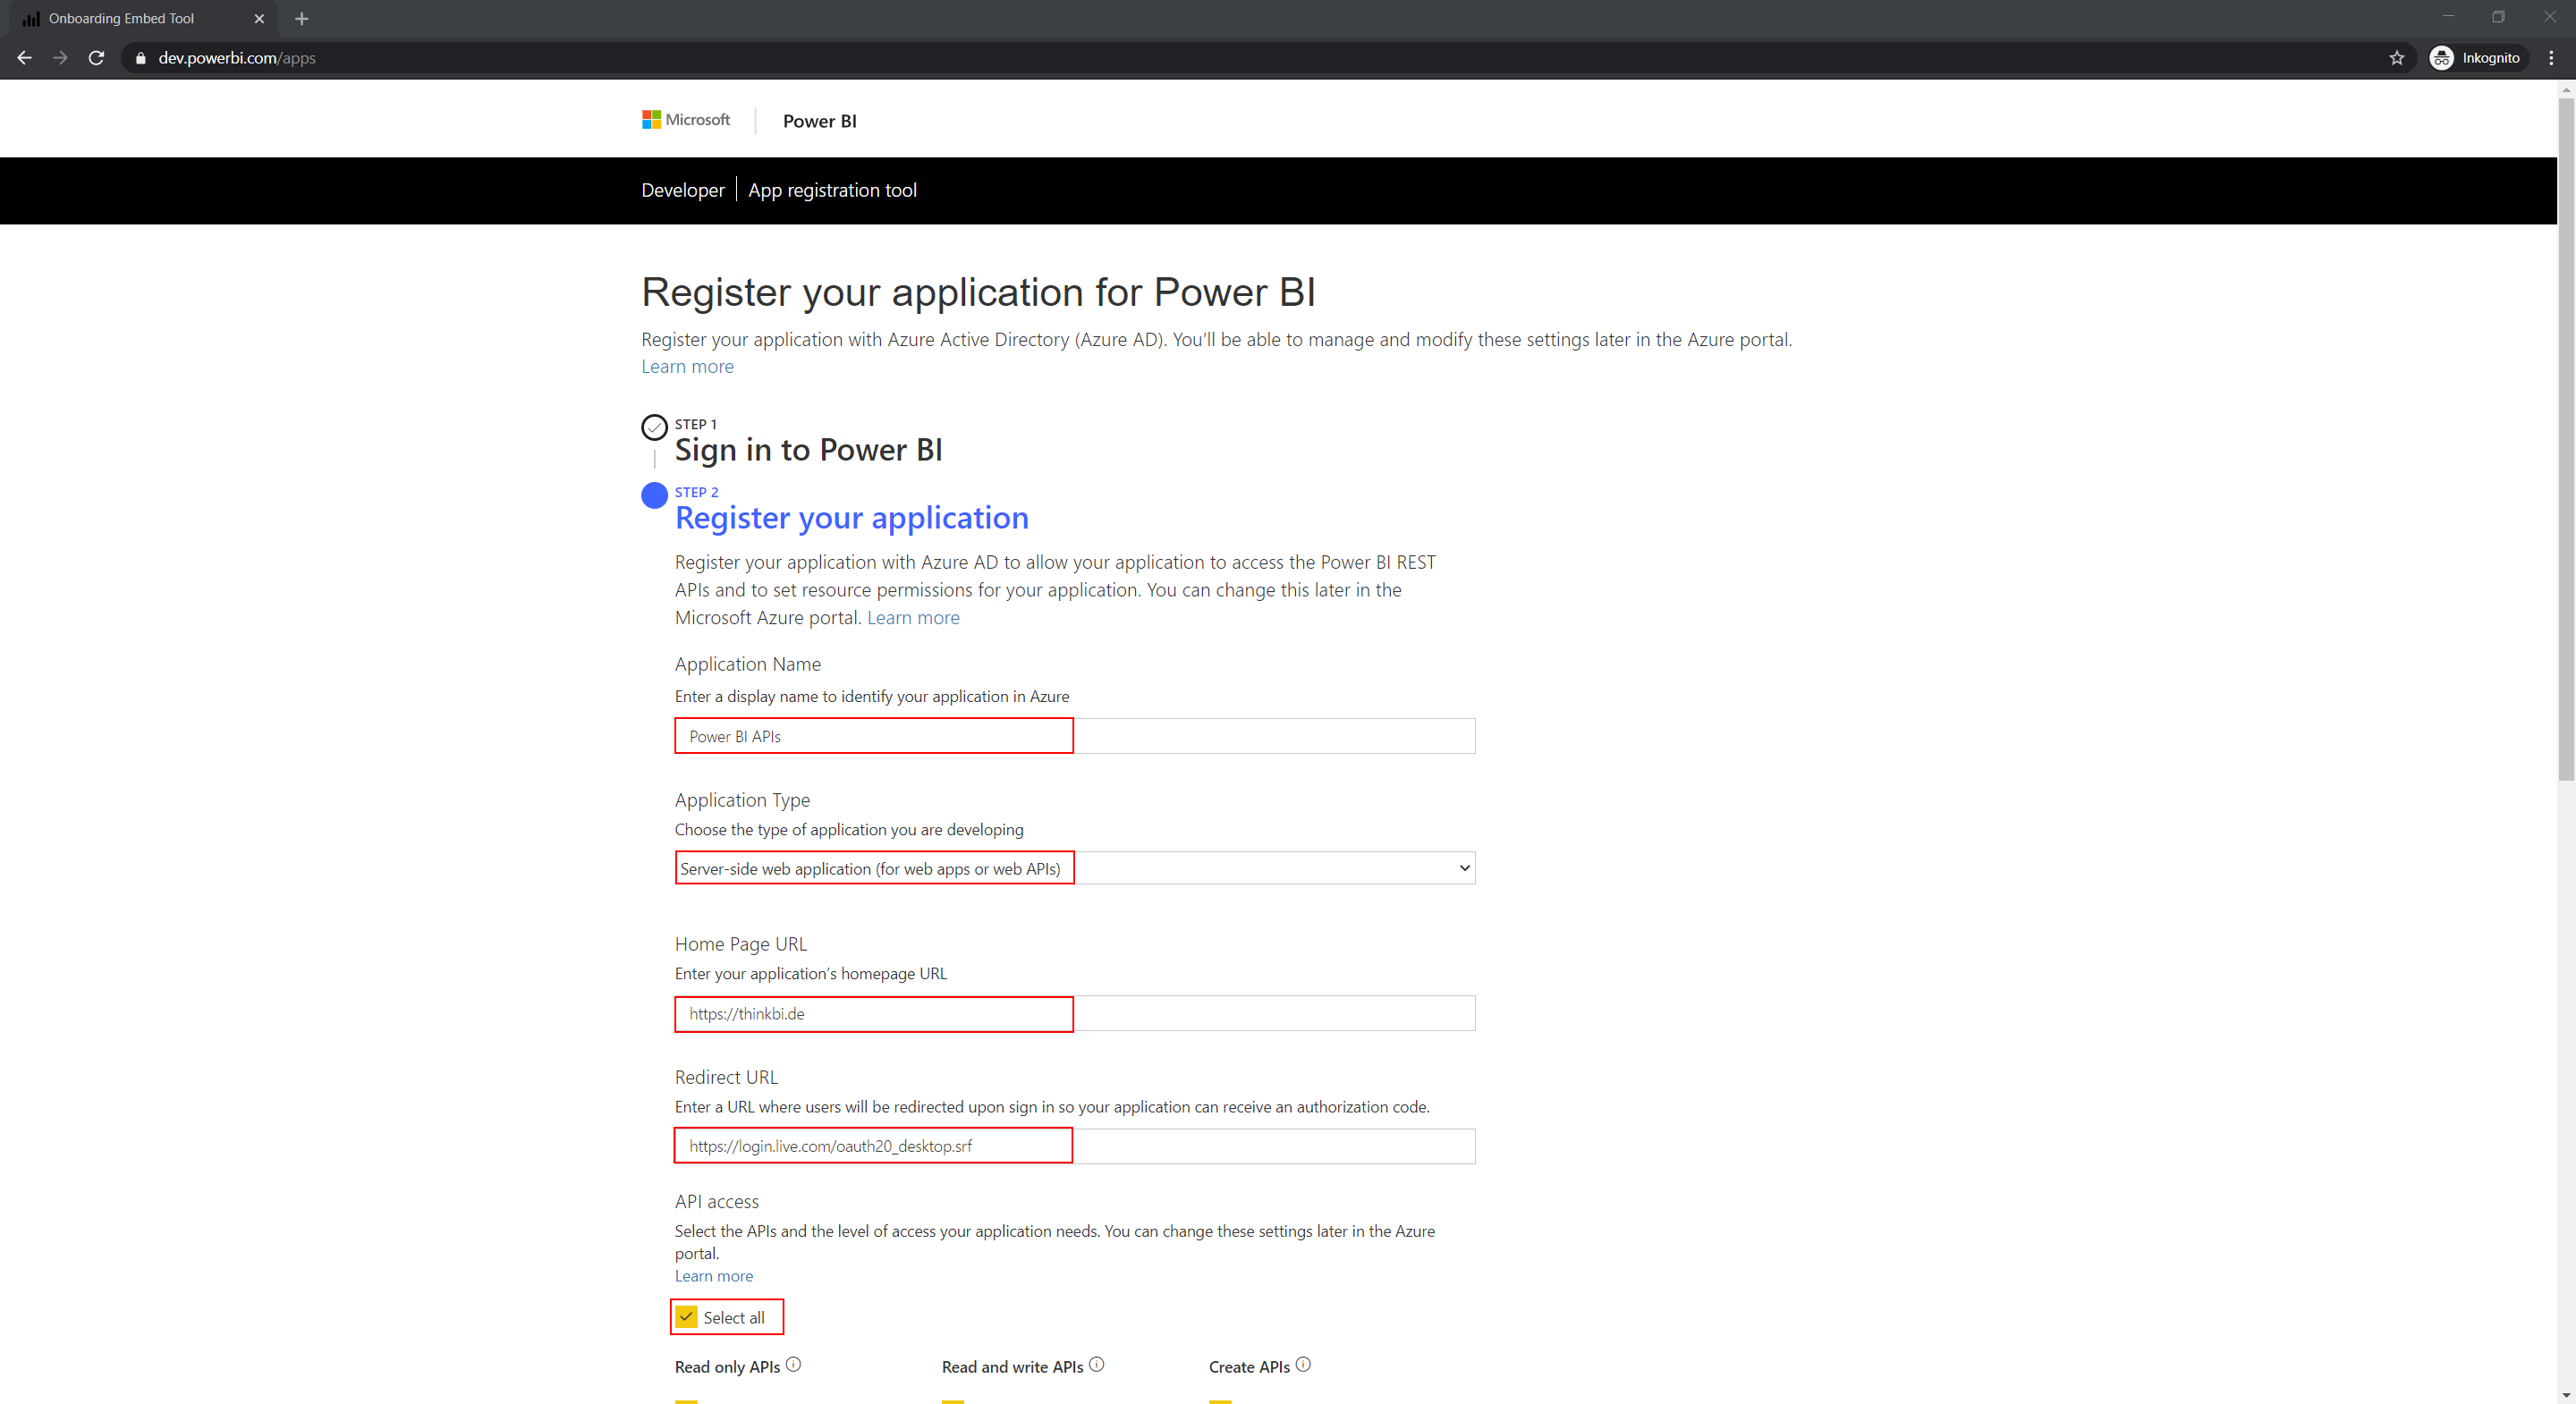
- Application Name: Enter the name of your application here
- Application Type: Server-Side web application (for web apps or web APIs)
- Home Page URL: Here you can enter the URL of your website / tenant
- Redirect URL: First enter https://login.live.com/oauth20_desktop.srf, this will later be replaced by a Redirect URL from Power Automate
- API access: I selected “Select all” to be able to use all API functions in Power Automate. You can also change access later using the Azure portal.
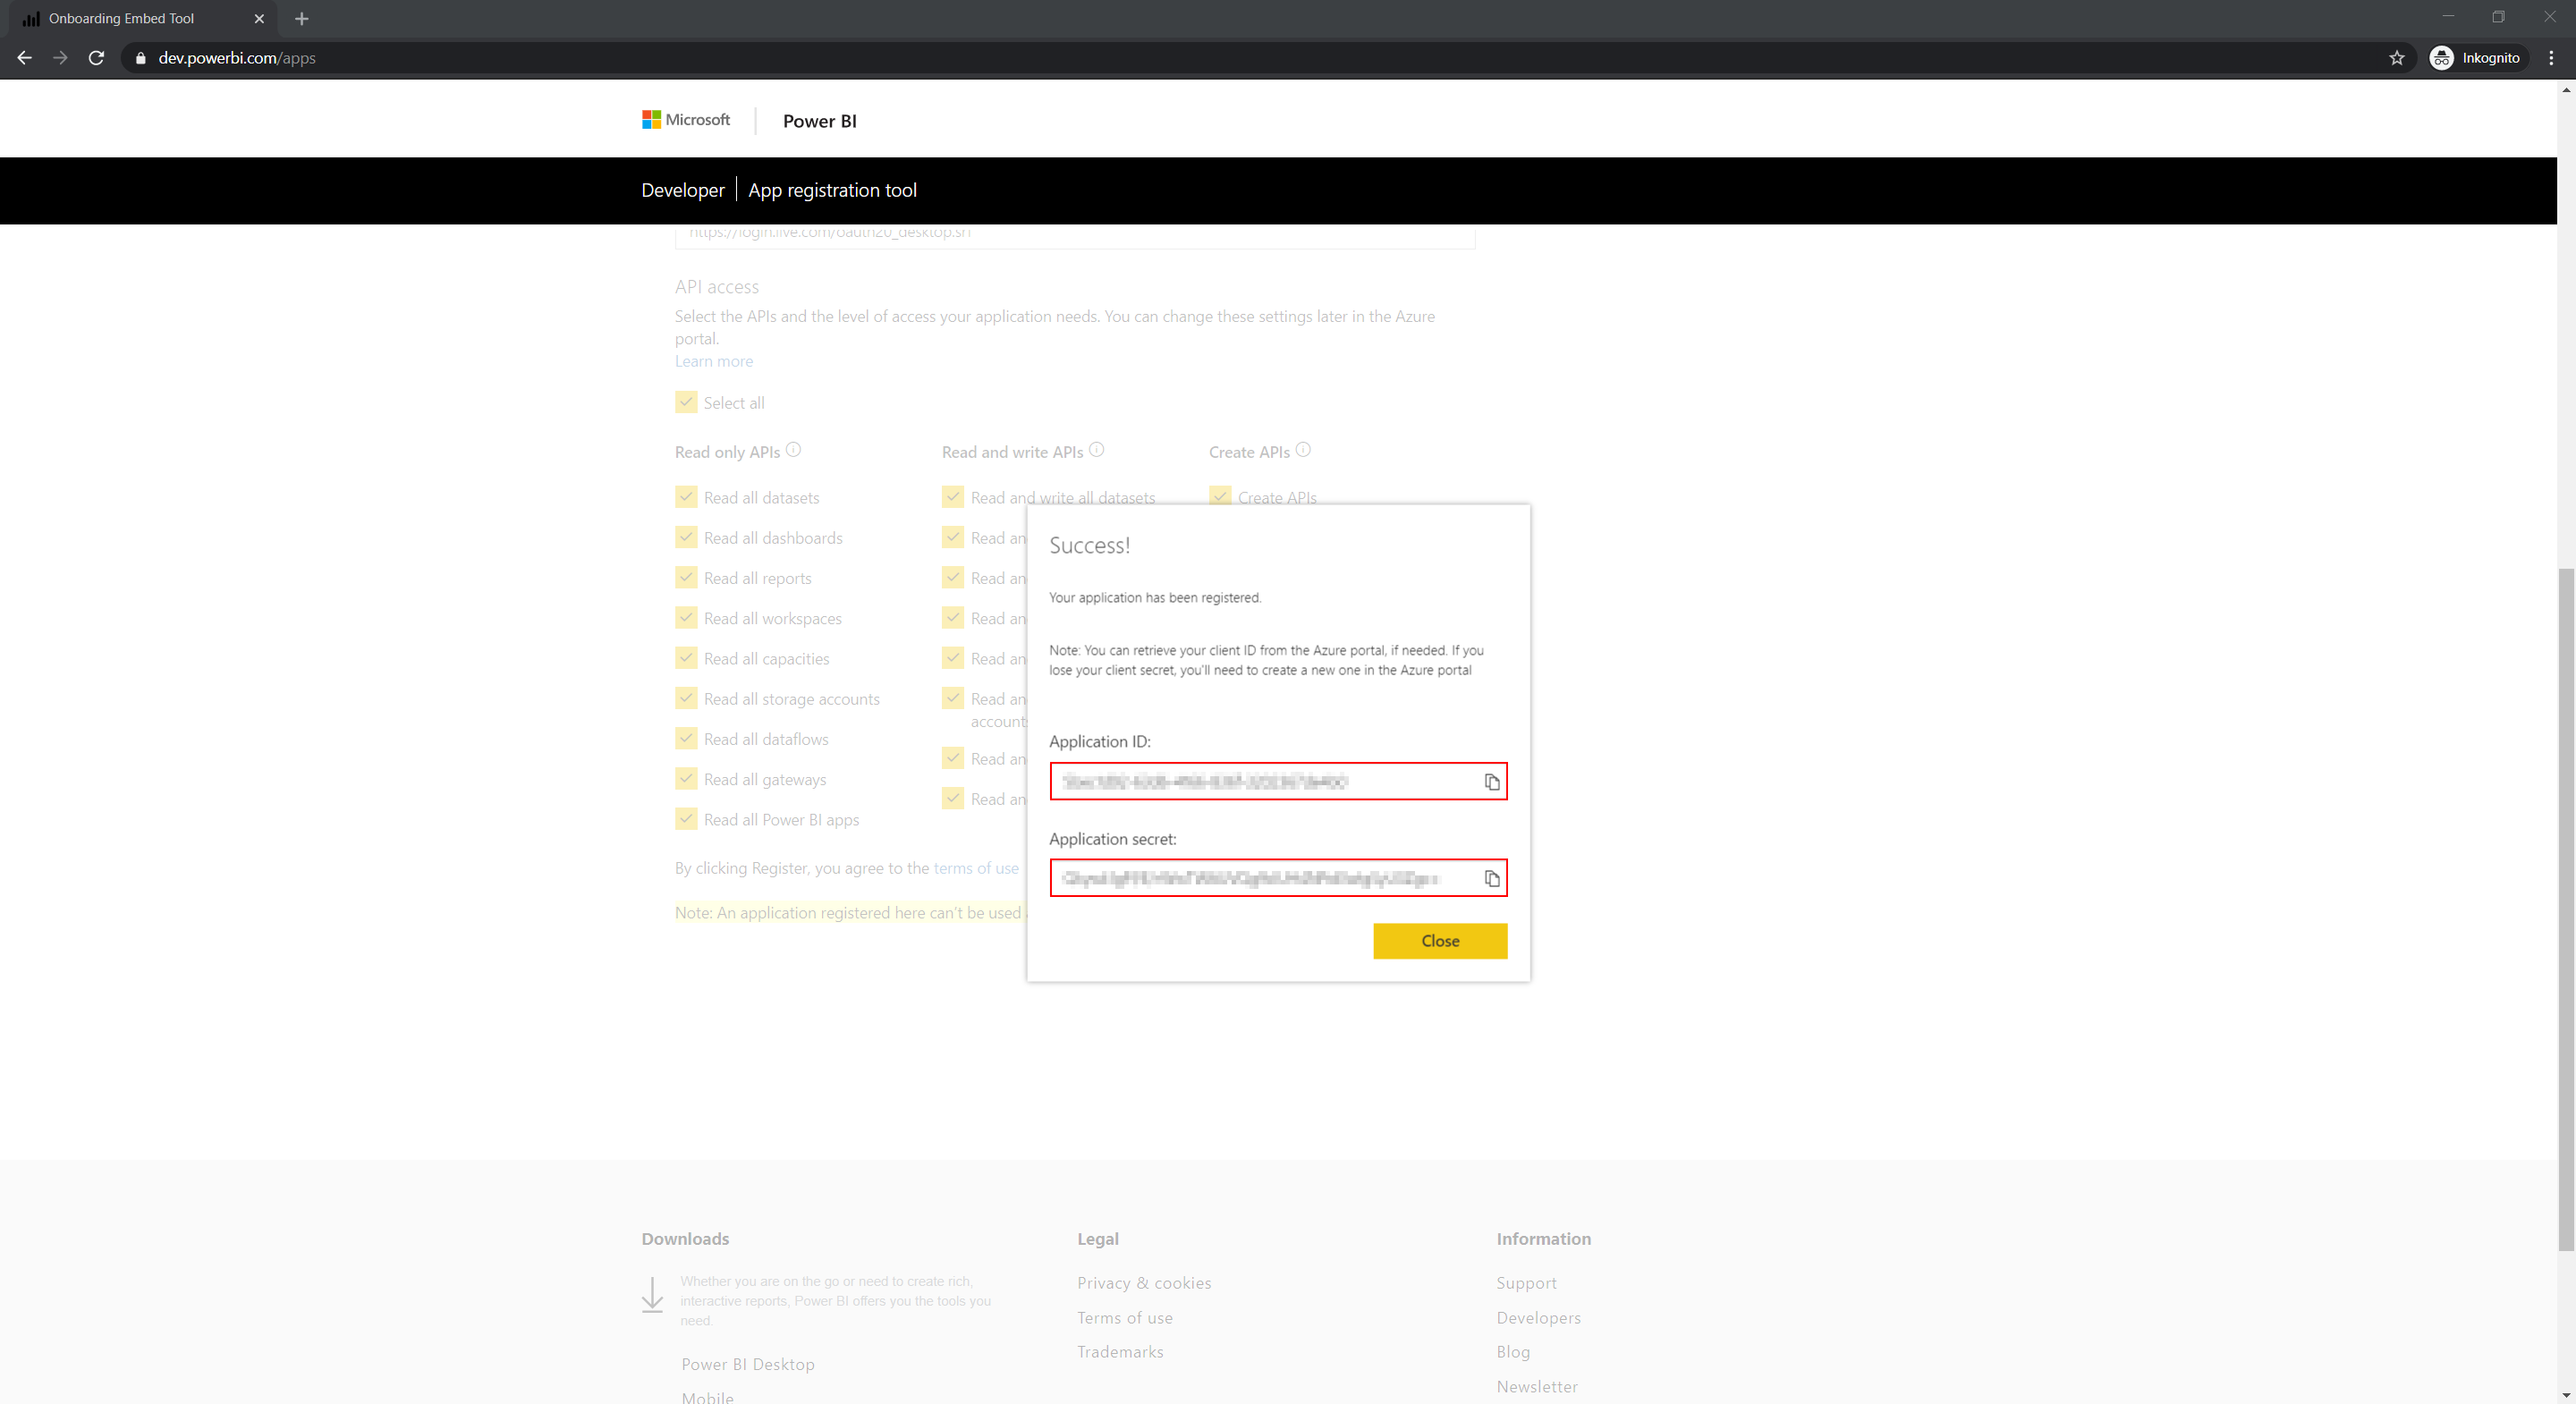
Now we “Register” the application and save the “Application ID” and “Application secret” somewhere safe. They will be needed later.
Creation of a Power Automate Custom Connector
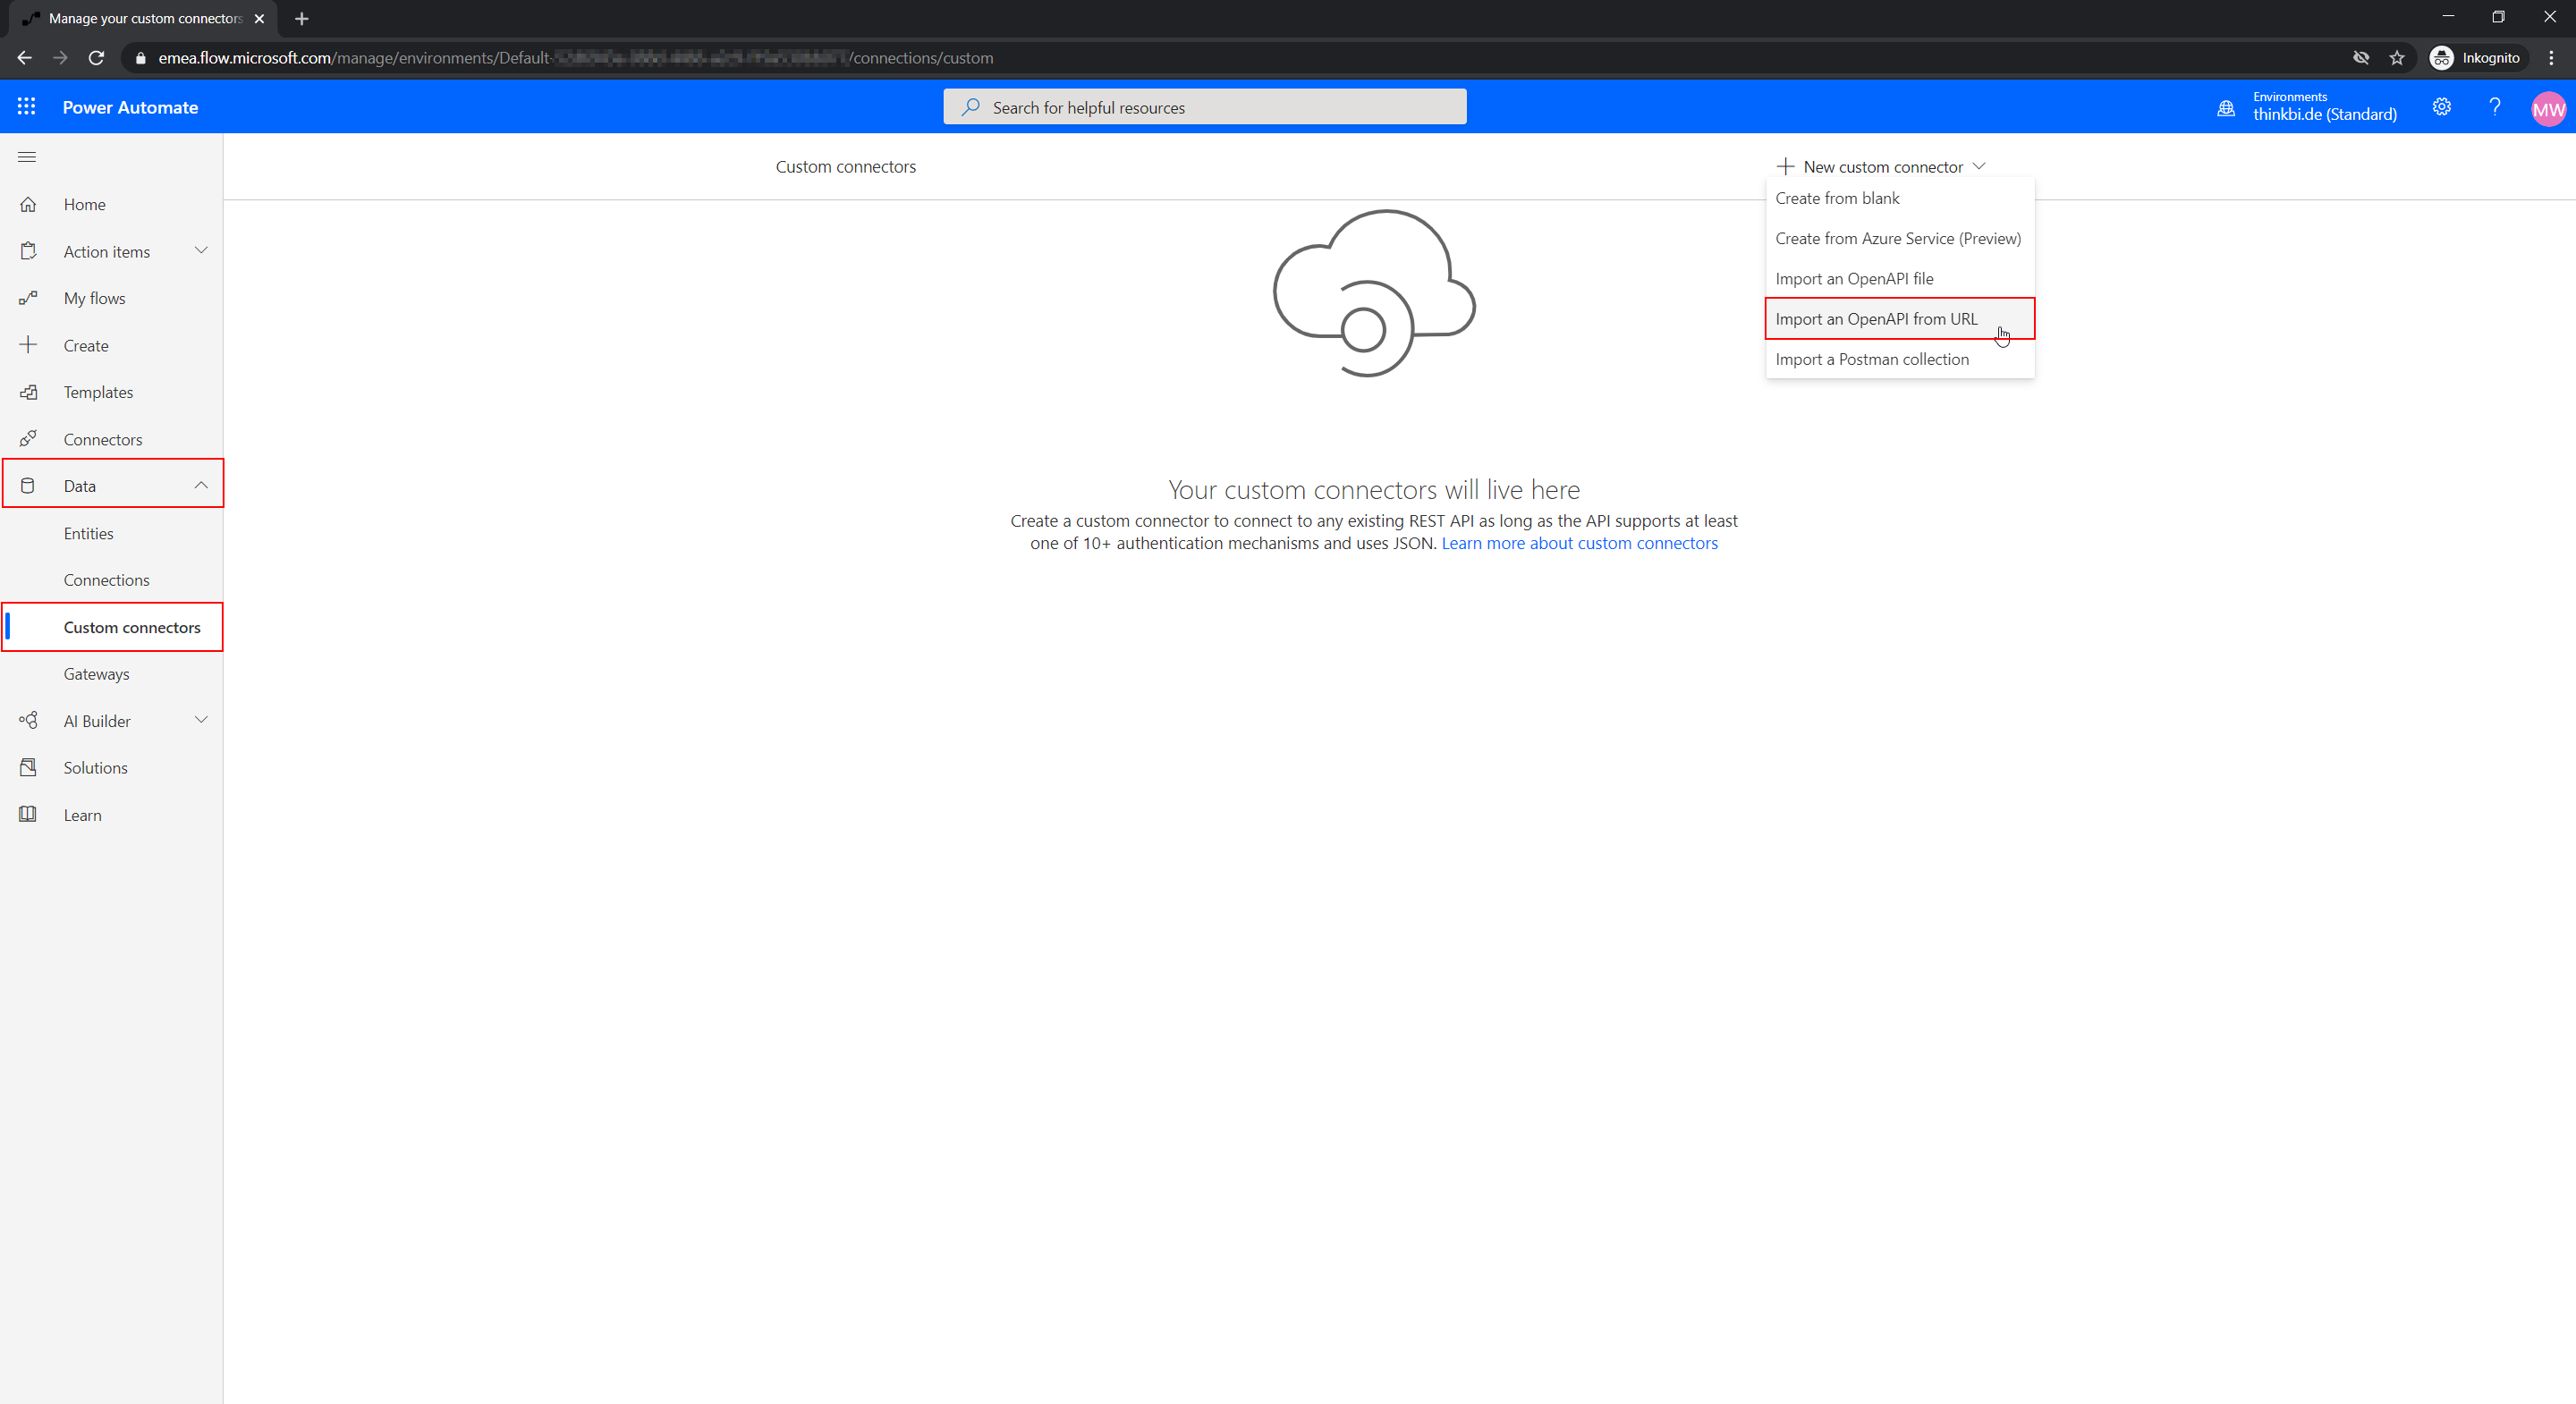
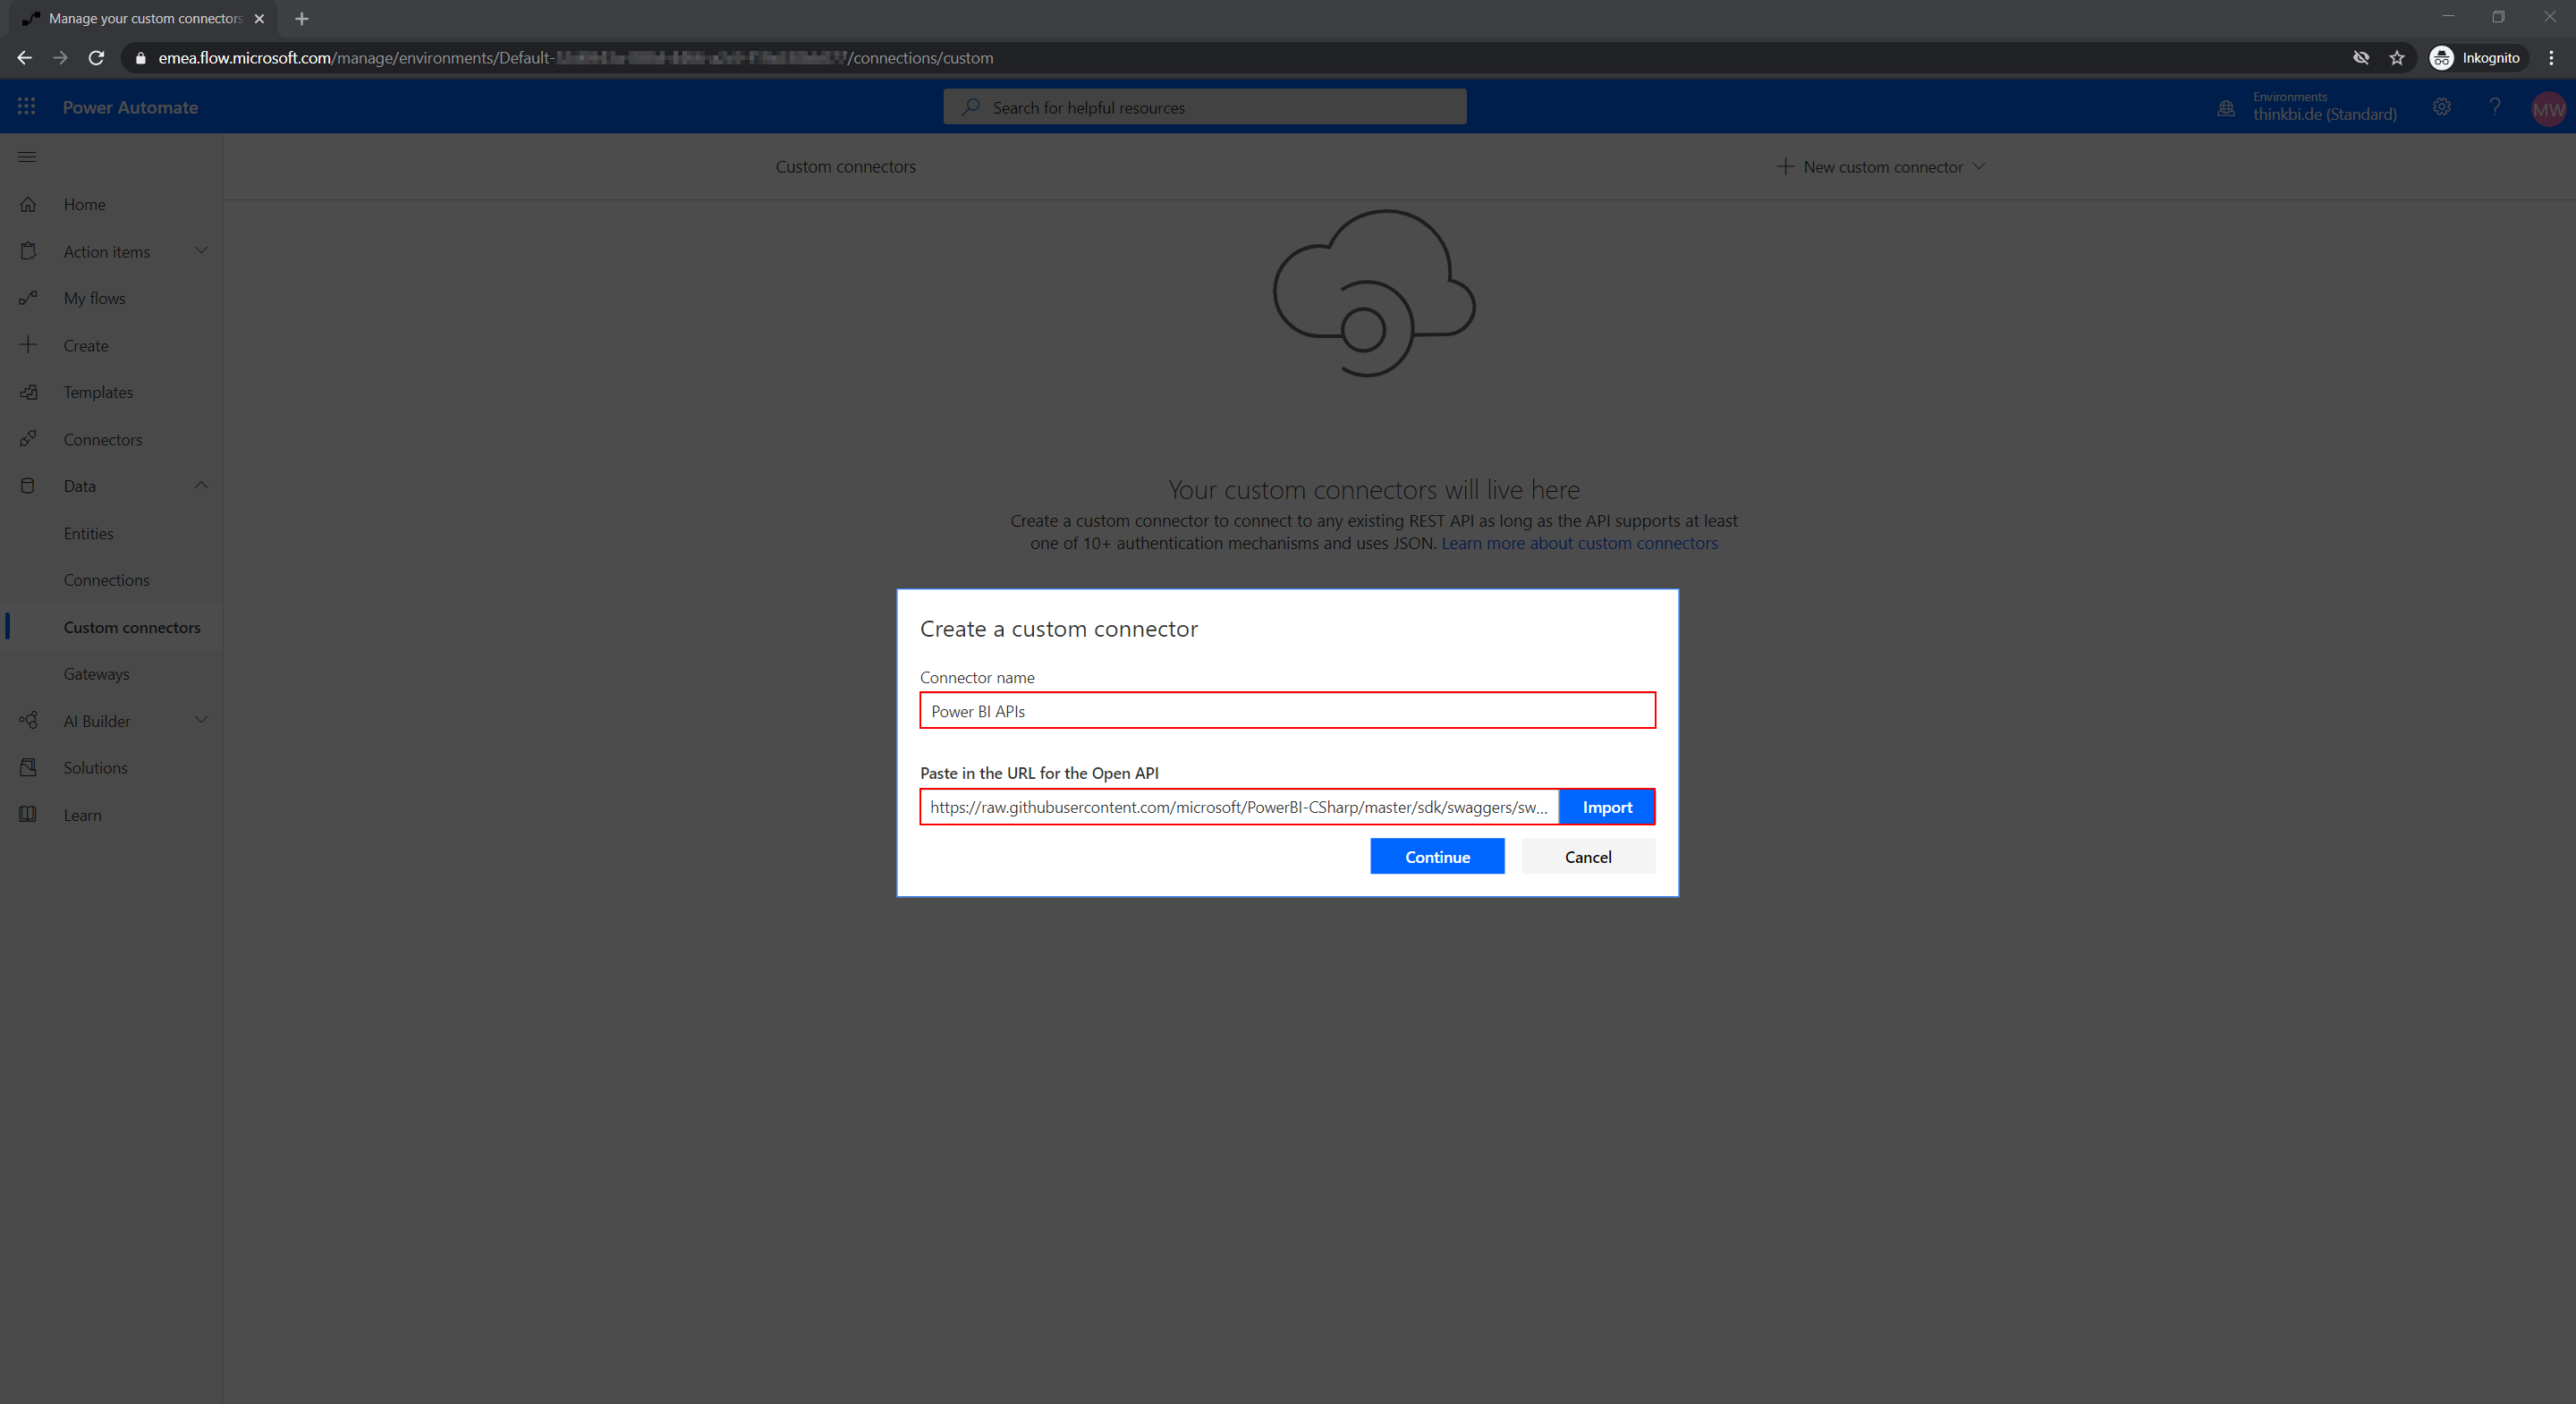
Navigate to Power Automate and select “Custom connectors” under “Data” in the left navigation. Here we select the “Import an OpenAPI from URL” option from the “Create custom connector” menu.
Enter a name for your connector and import the OpenAPI definition. An OpenAPI definition for the Power BI REST API can be found here. https://raw.githubusercontent.com/microsoft/PowerBI-CSharp/master/sdk/swaggers/swagger.json
The next dialog requires some general information about the connector.
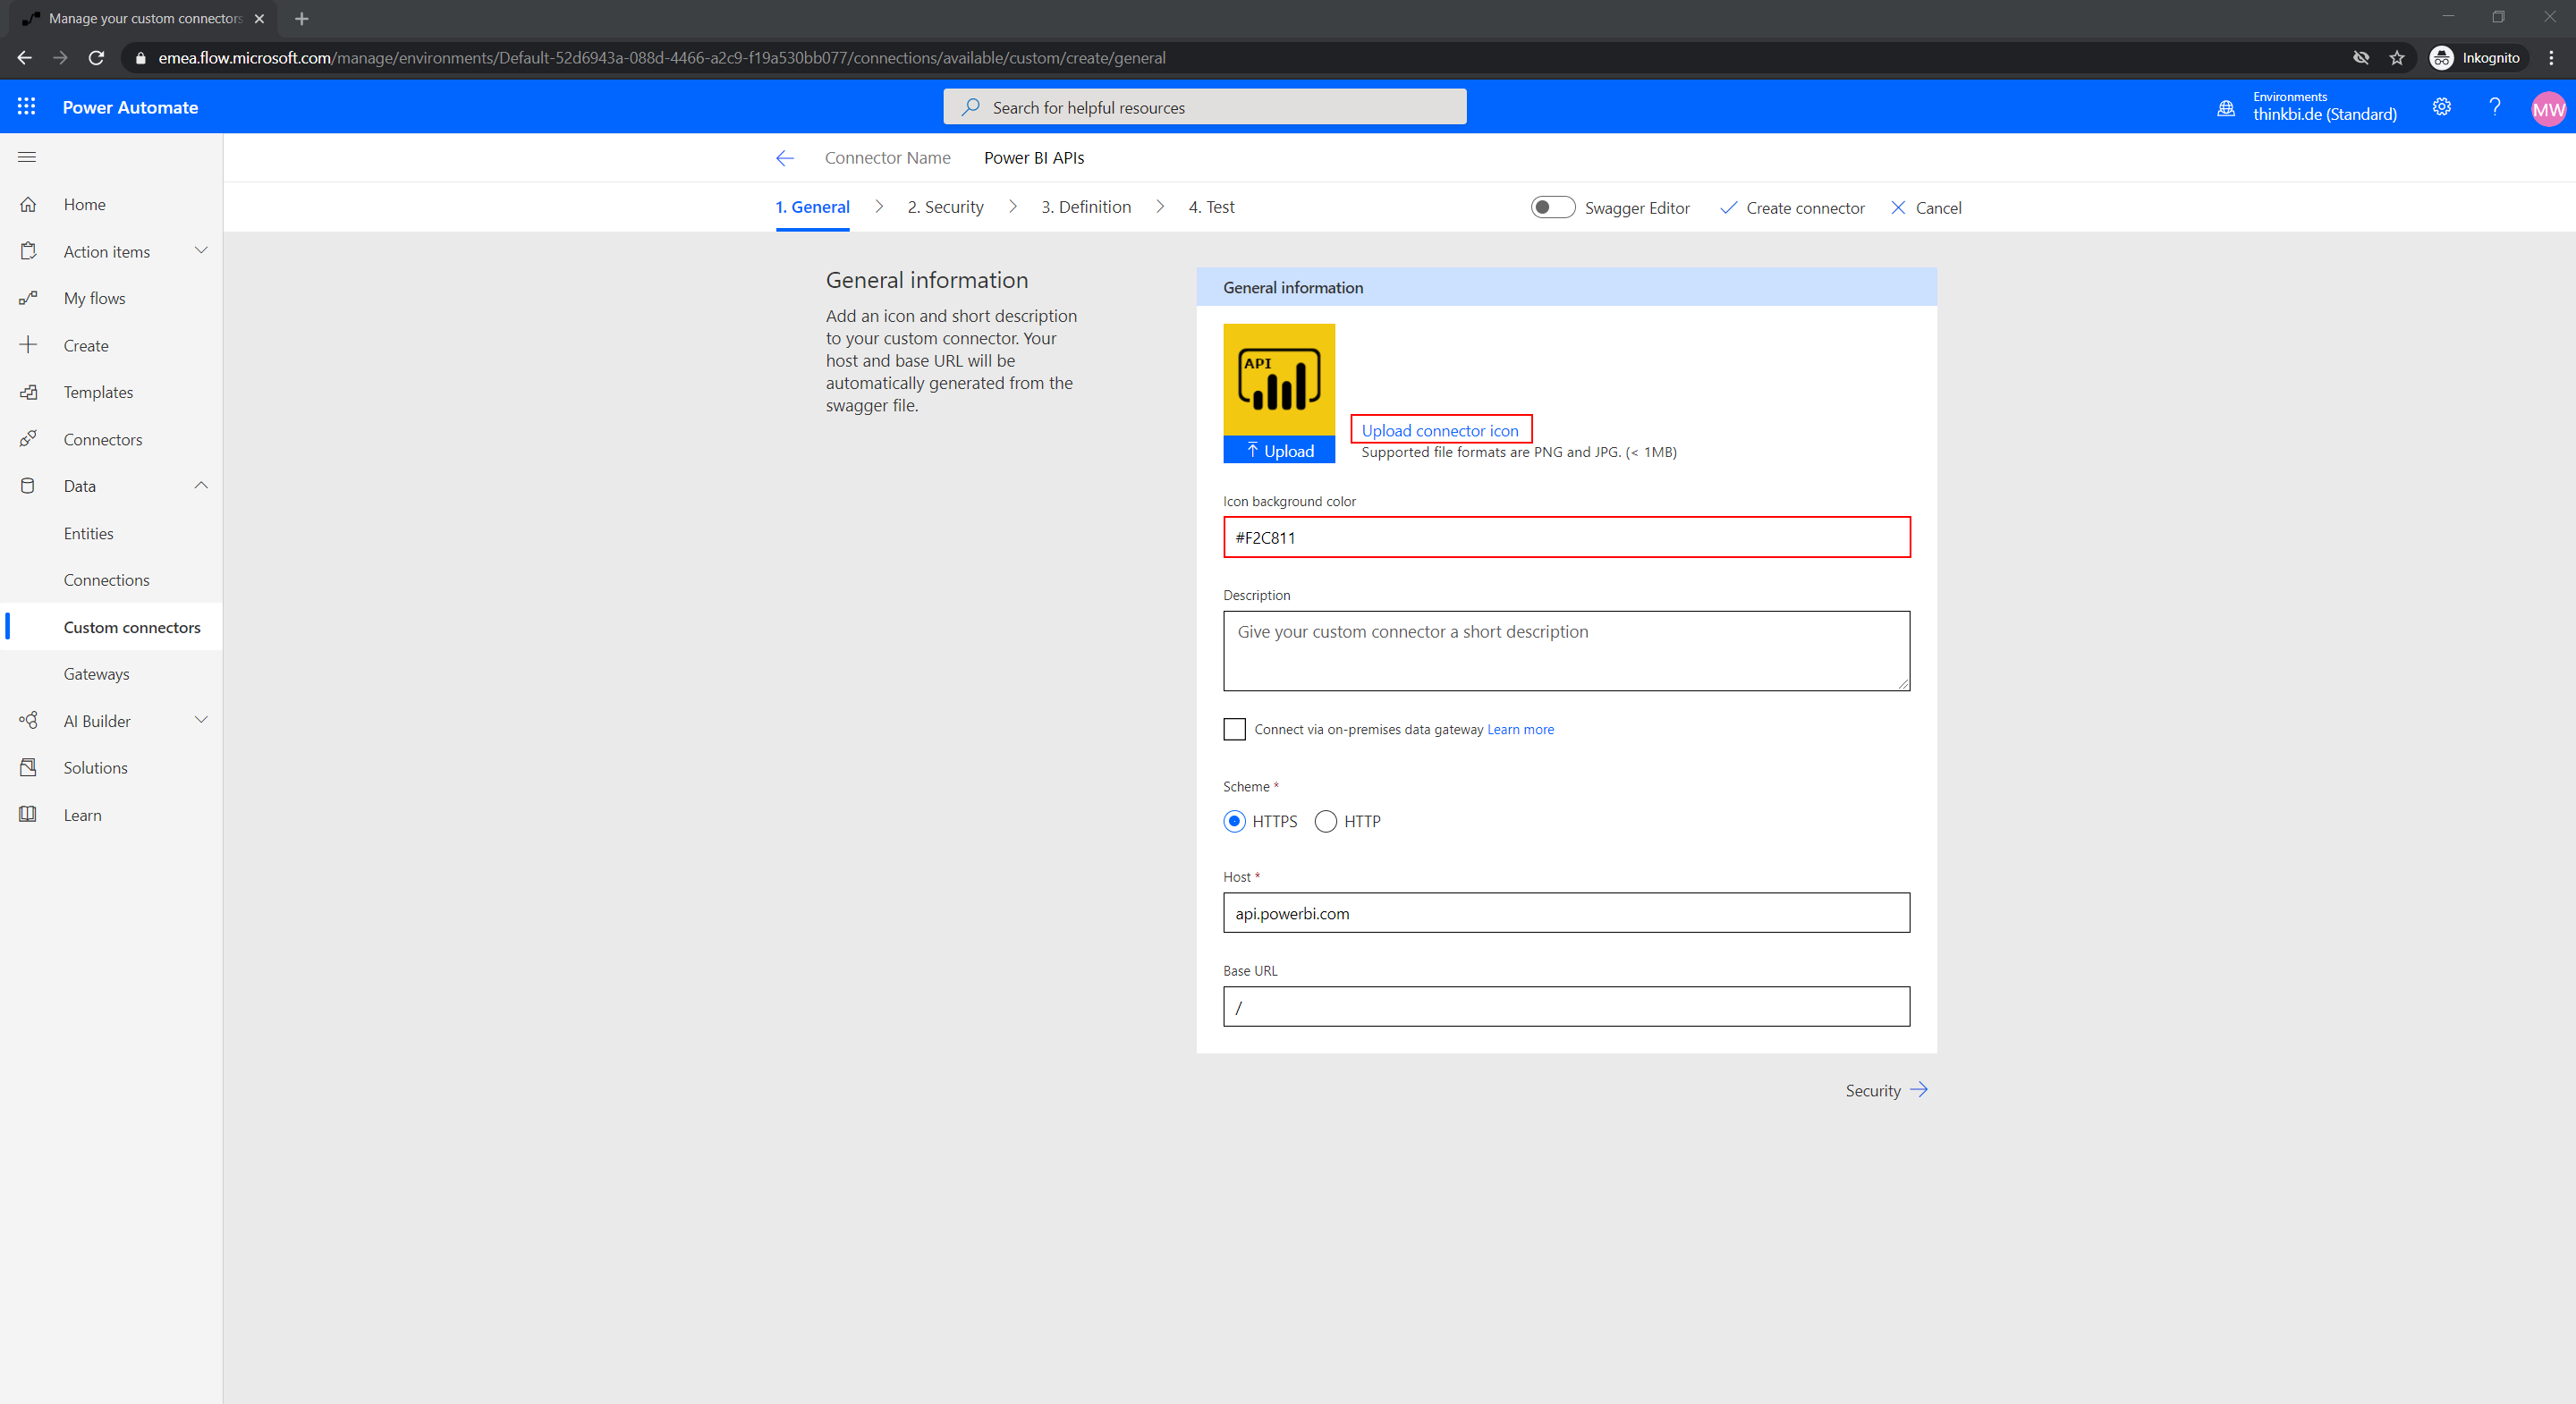
I uploaded an icon for the connector and set the background color to: #F2C811
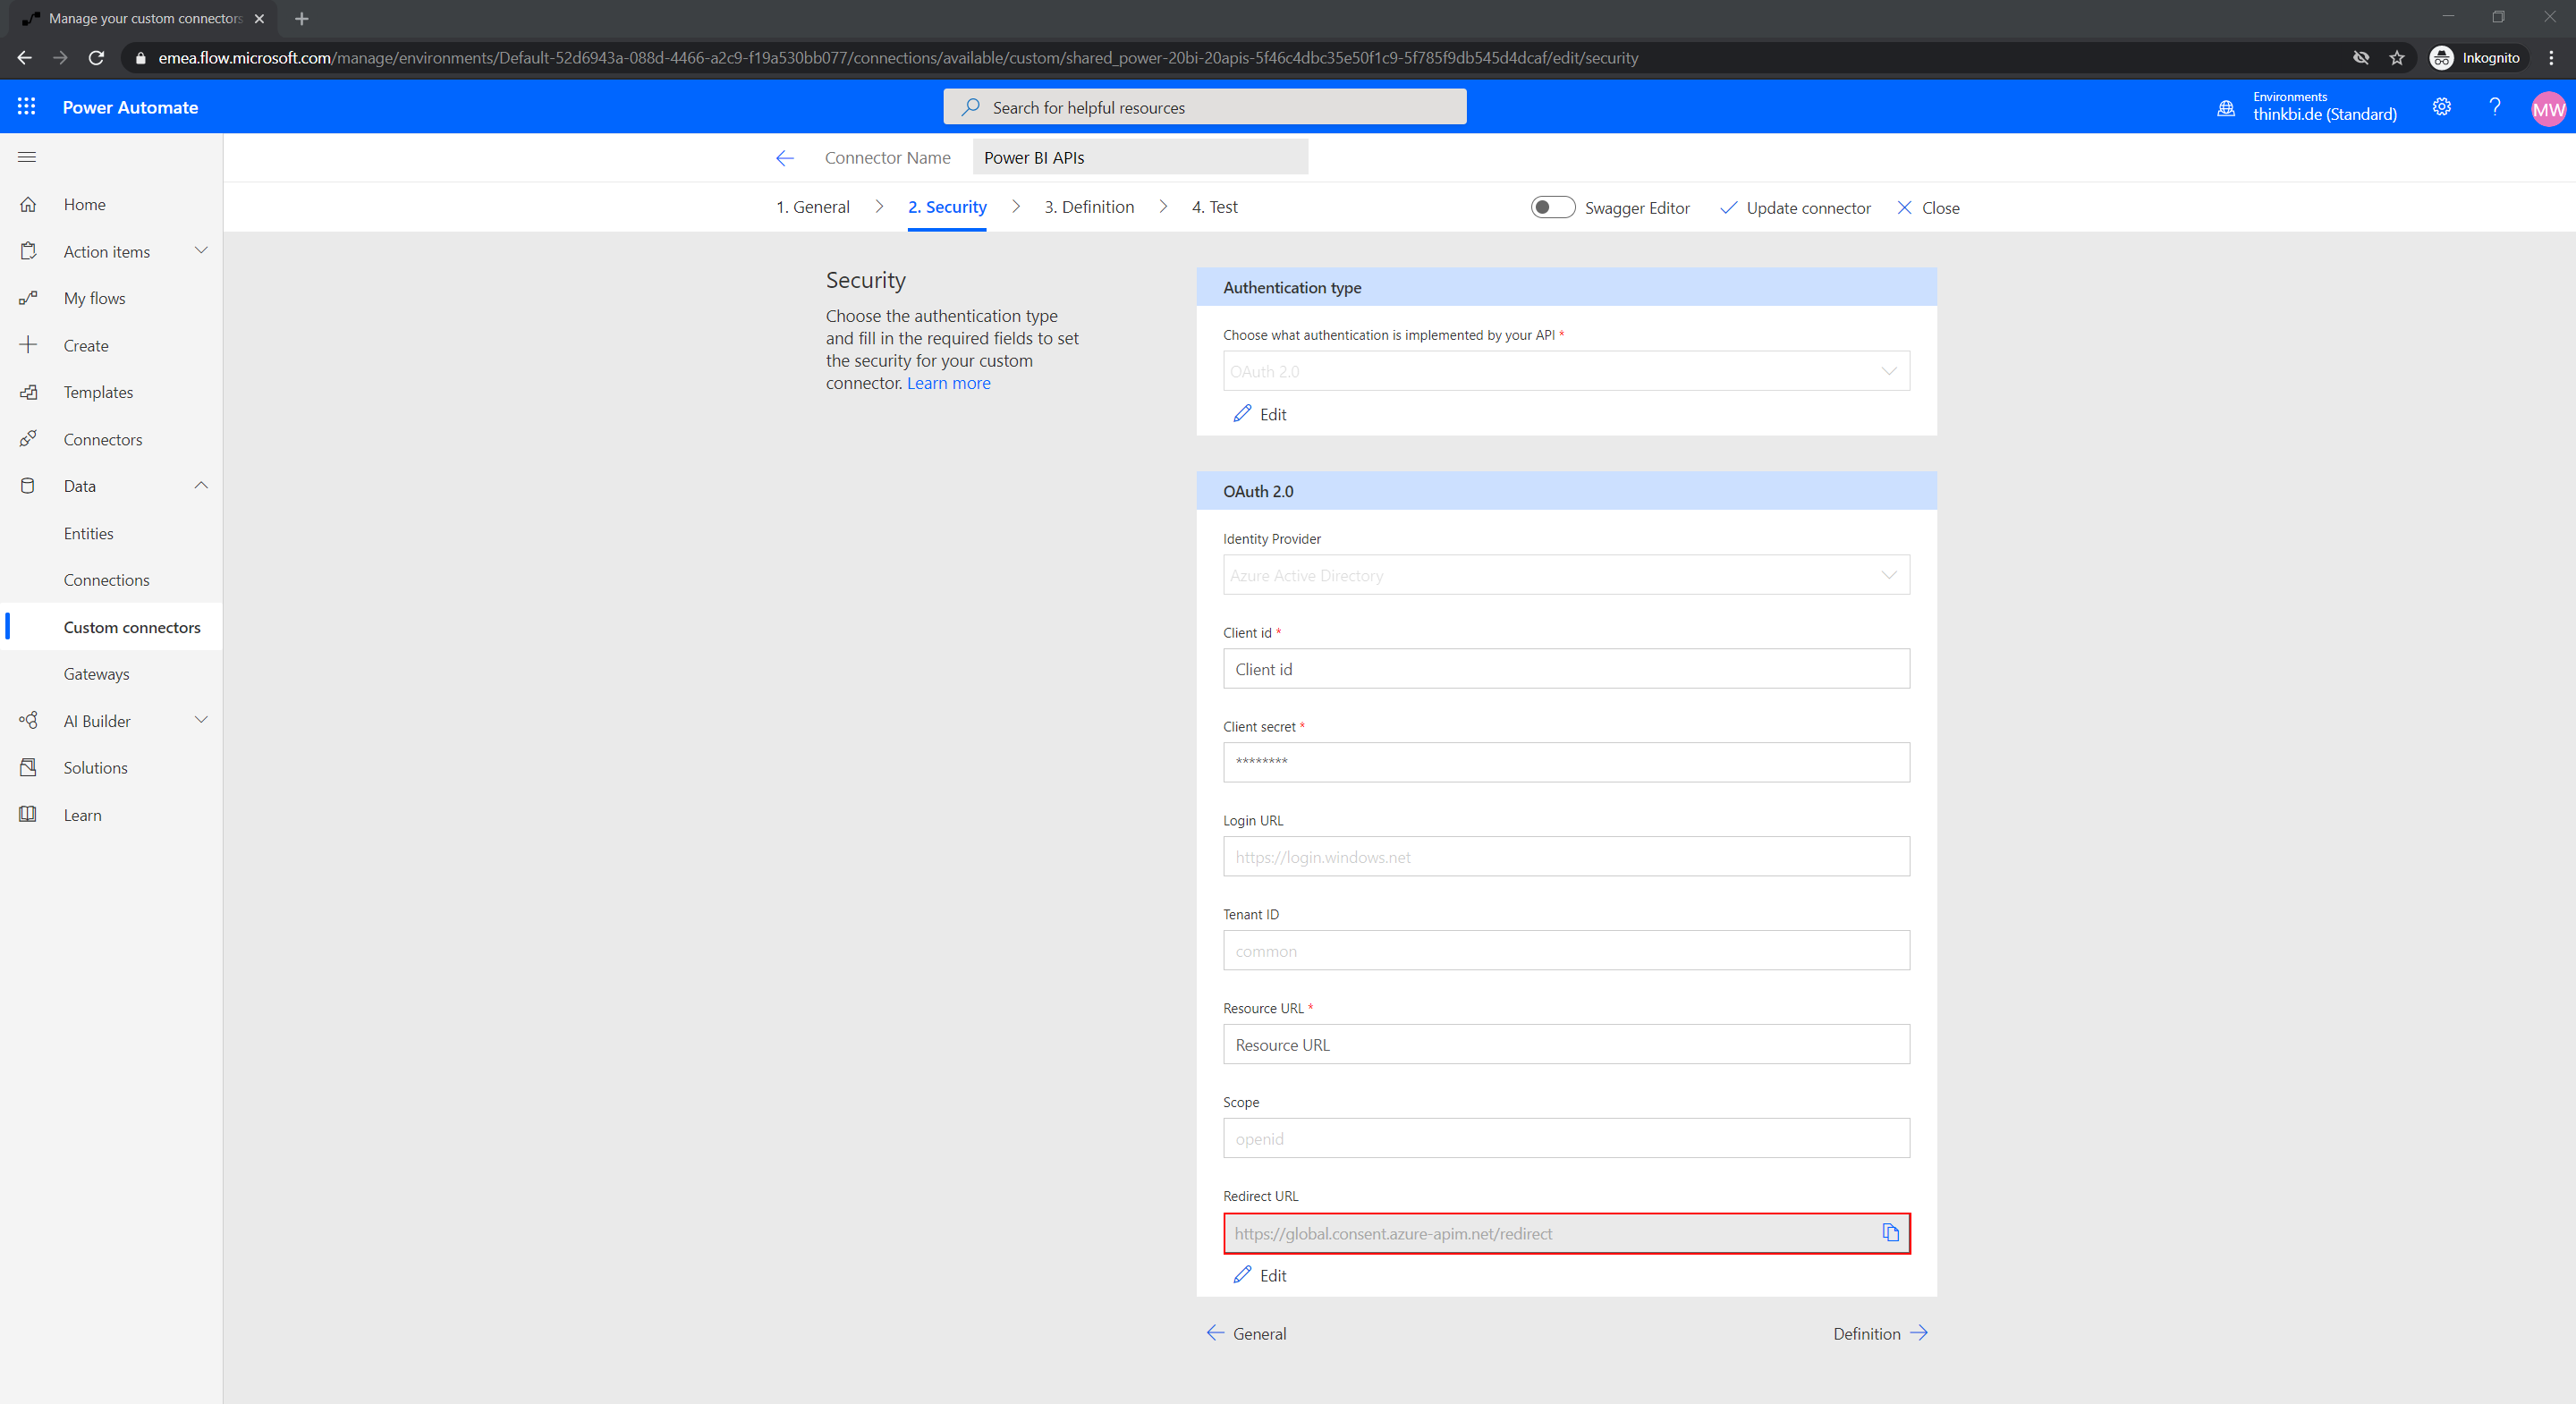
The next dialog is to configure security.

Konstantinos has determined the following values for Azure authentication here.
- Authentication type: OAuth 2.0
- Identity Provider: Azure Active Directory
- Client id: Enter the “Application ID” from the application registration
- Client secret: Enter the “Application secret” from the application registration
- Login URL: https://login.windows.net
- Tenant ID: common
- Resource URL: https://analysis.windows.net/powerbi/api
- Scope: openid
After clicking on “Create connector” the Redirect URL is displayed. Depending on your location, this URL may be different.
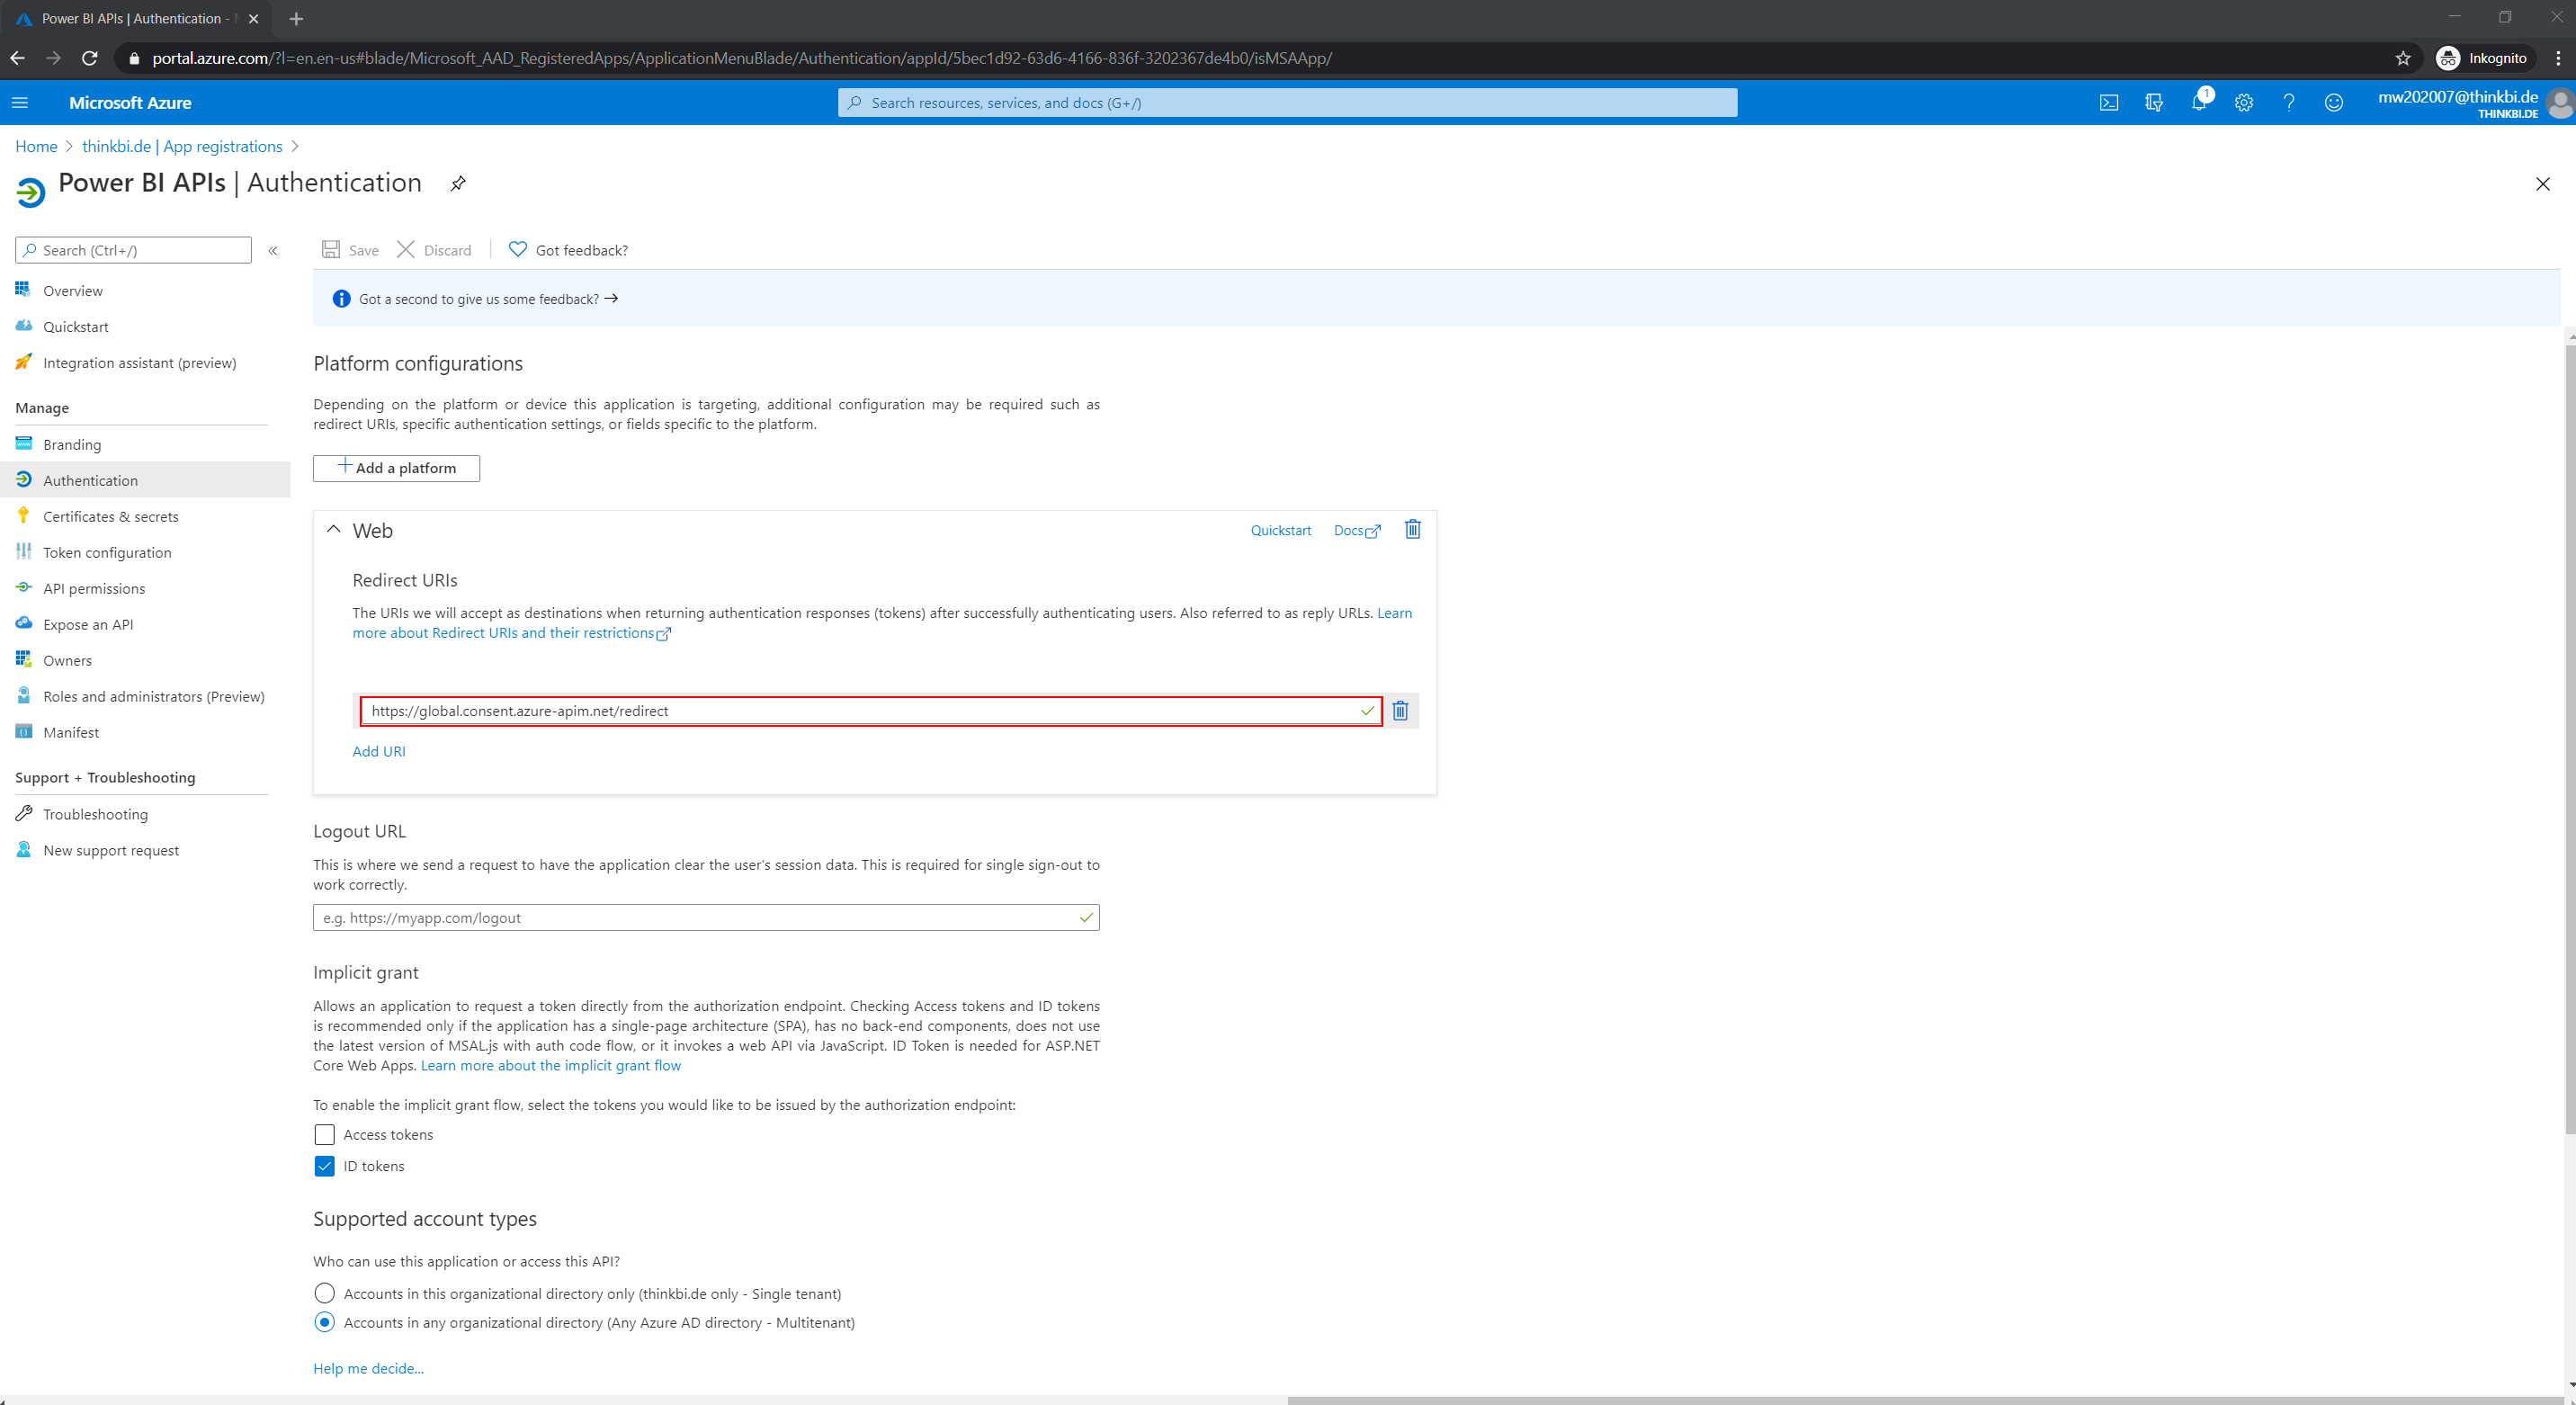
Add the Redirect URL to the previously registered Application. Sign in to the Azure portal https://portal.azure.com
“Azure Active Directory” -> “App registrations” -> “Name of our app”. Under “Authentication”, replace the “Redirect URIs” with the URL from Power Automate.
Creation of the Power Automate Flow
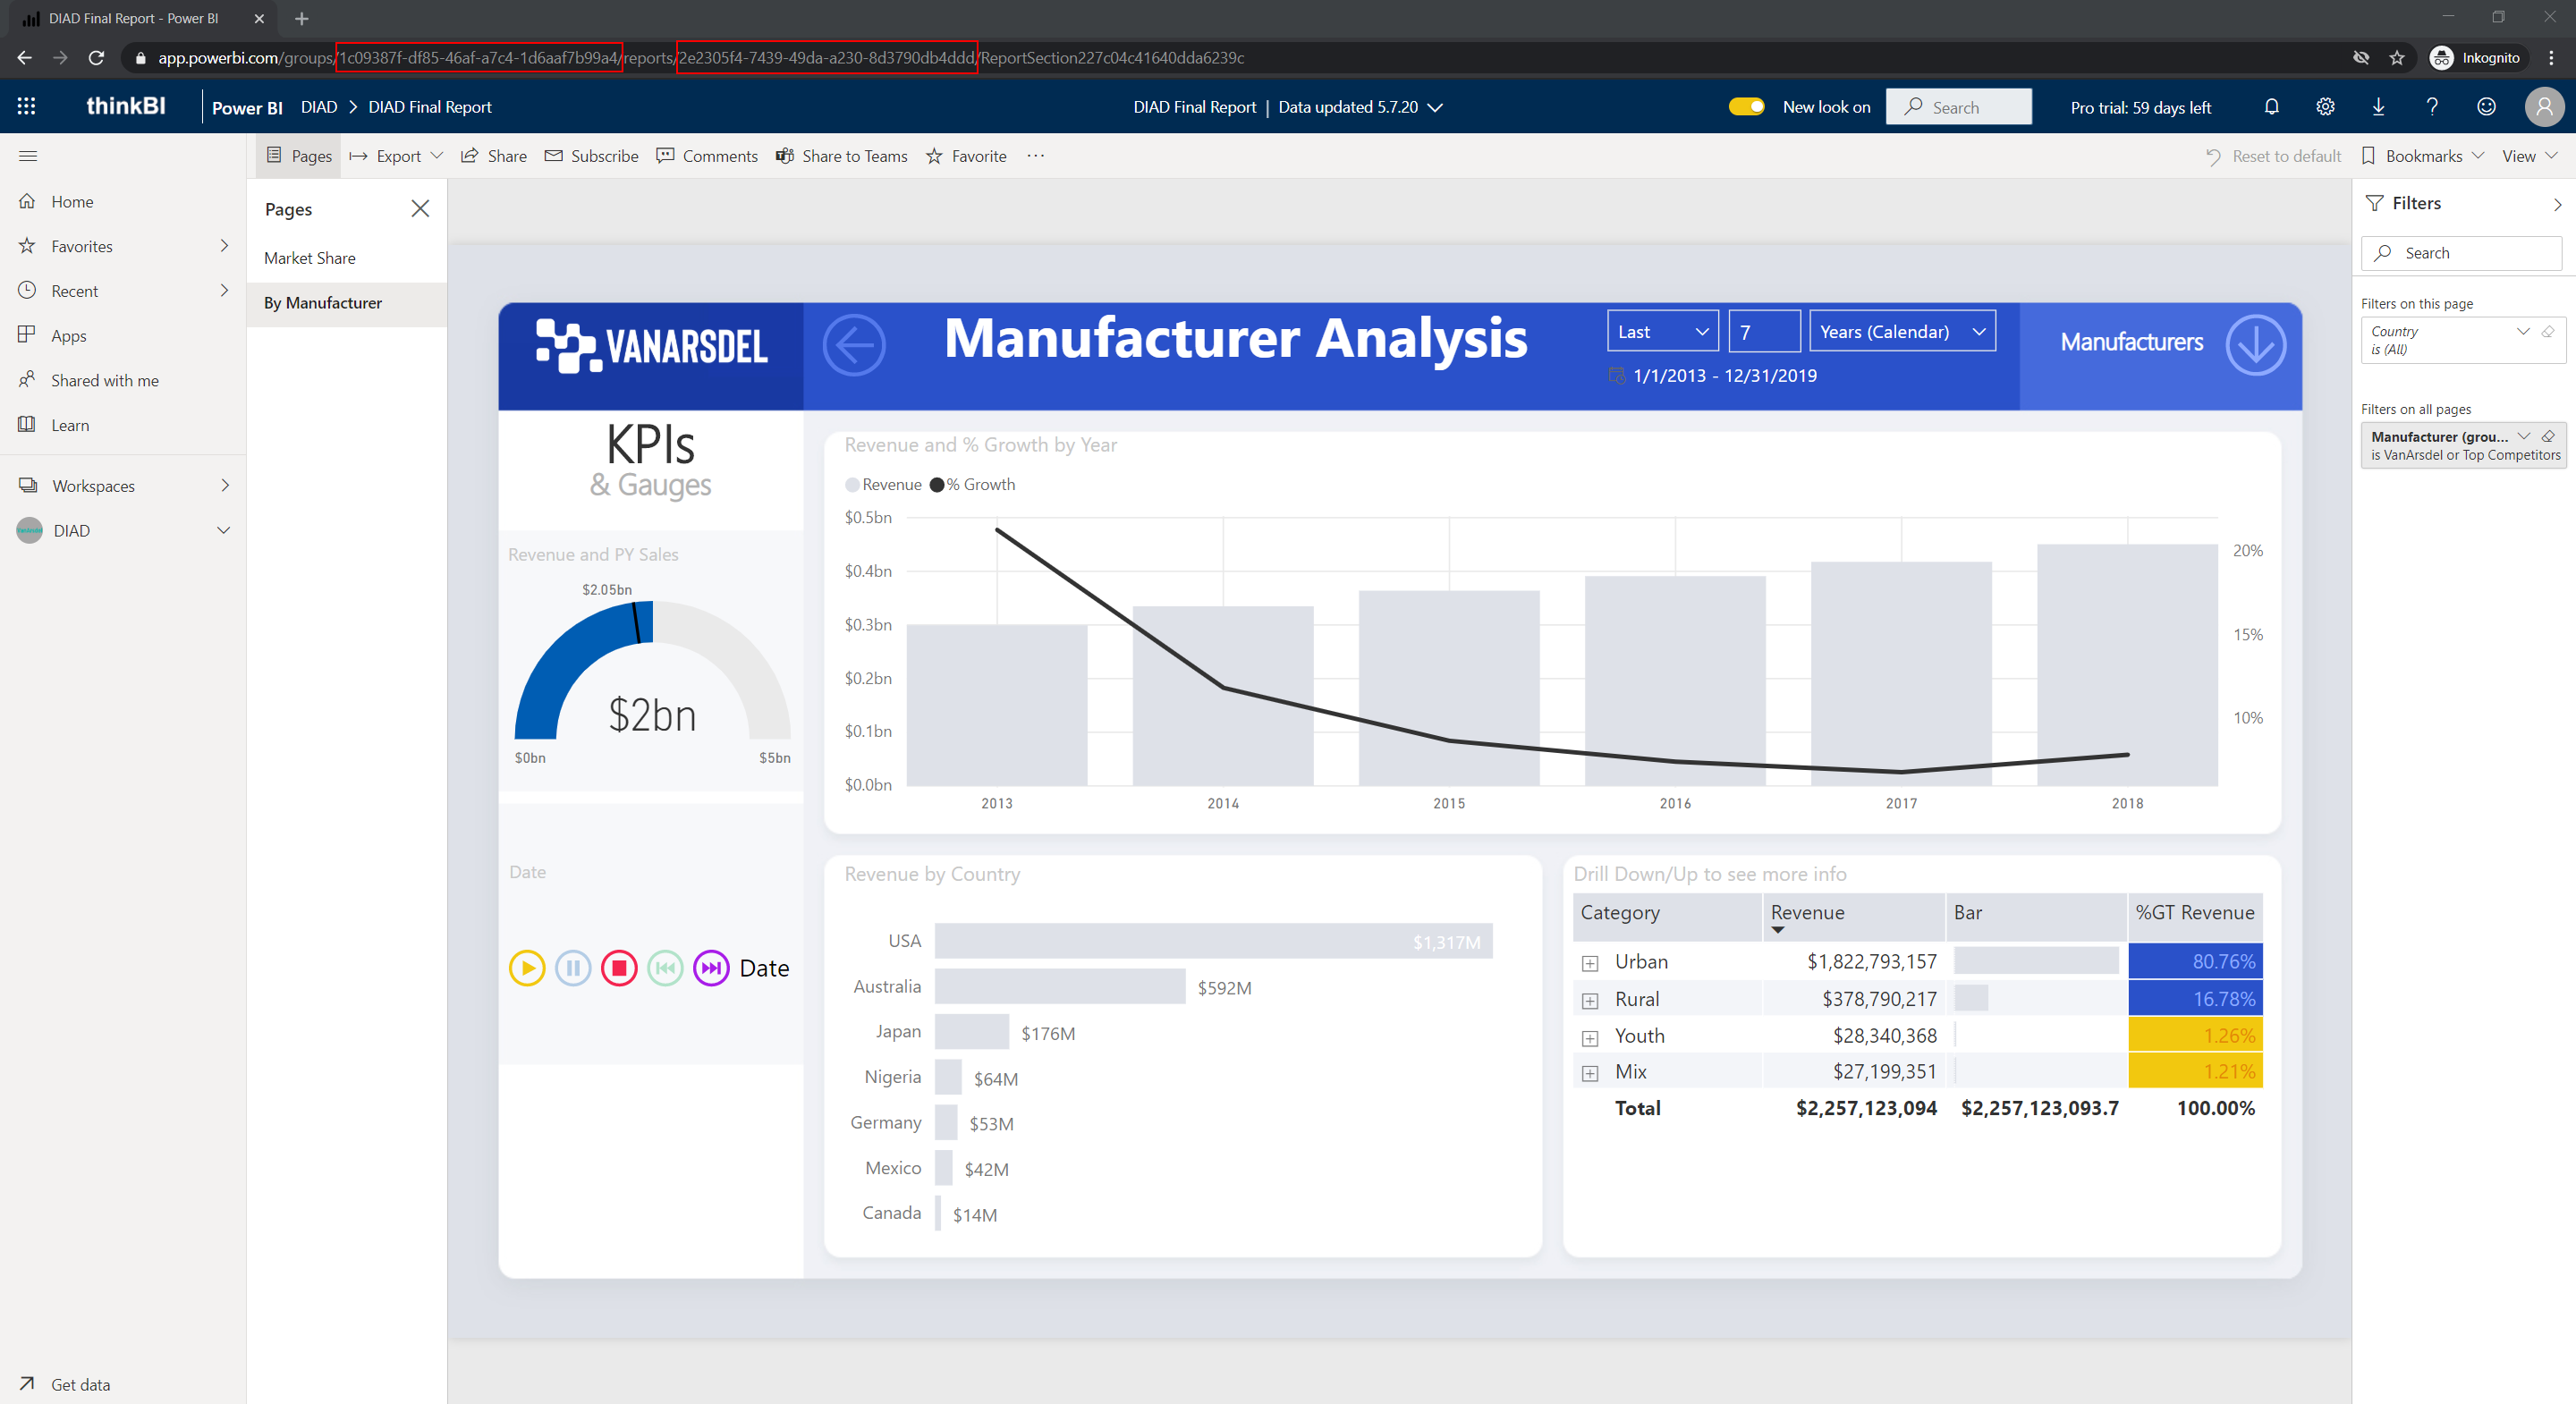
Now we create the Power Automate Flow. First we determine the GUID of the workspace and the Power BI report that is to be archived. After opening the report, the values can be read from the address line.
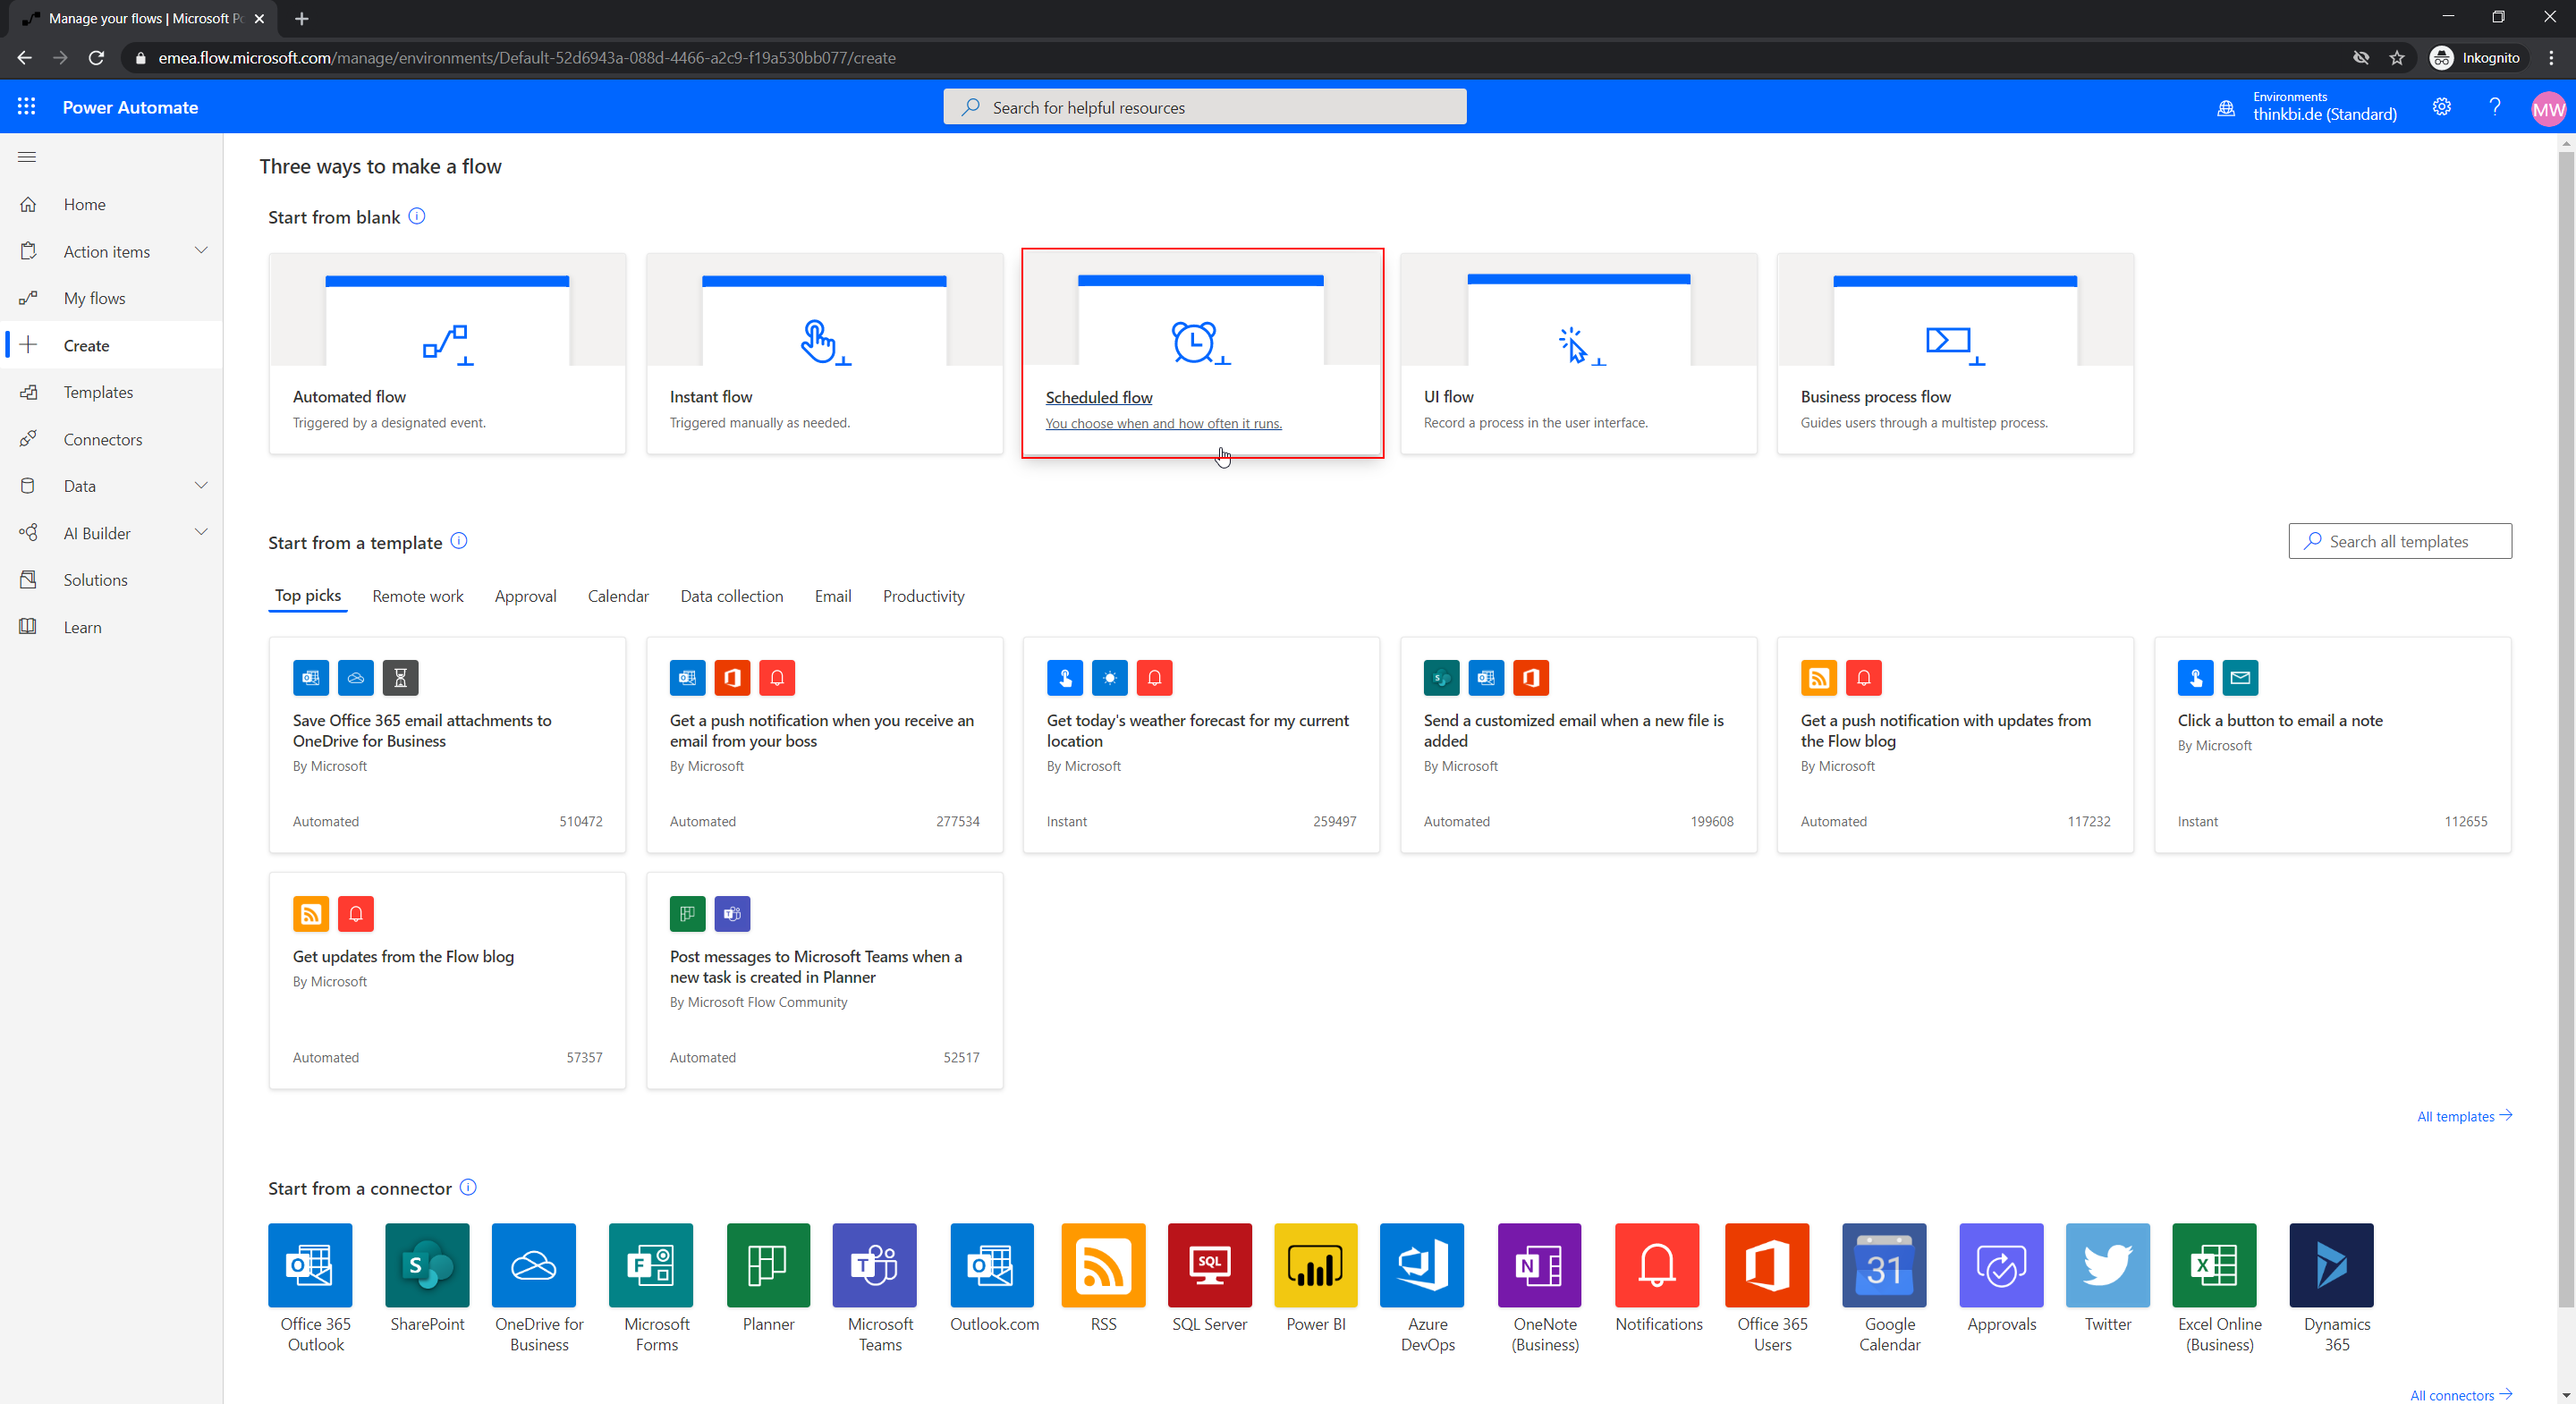
For the monthly execution we choose a “Scheduled flow” in Power Automate.
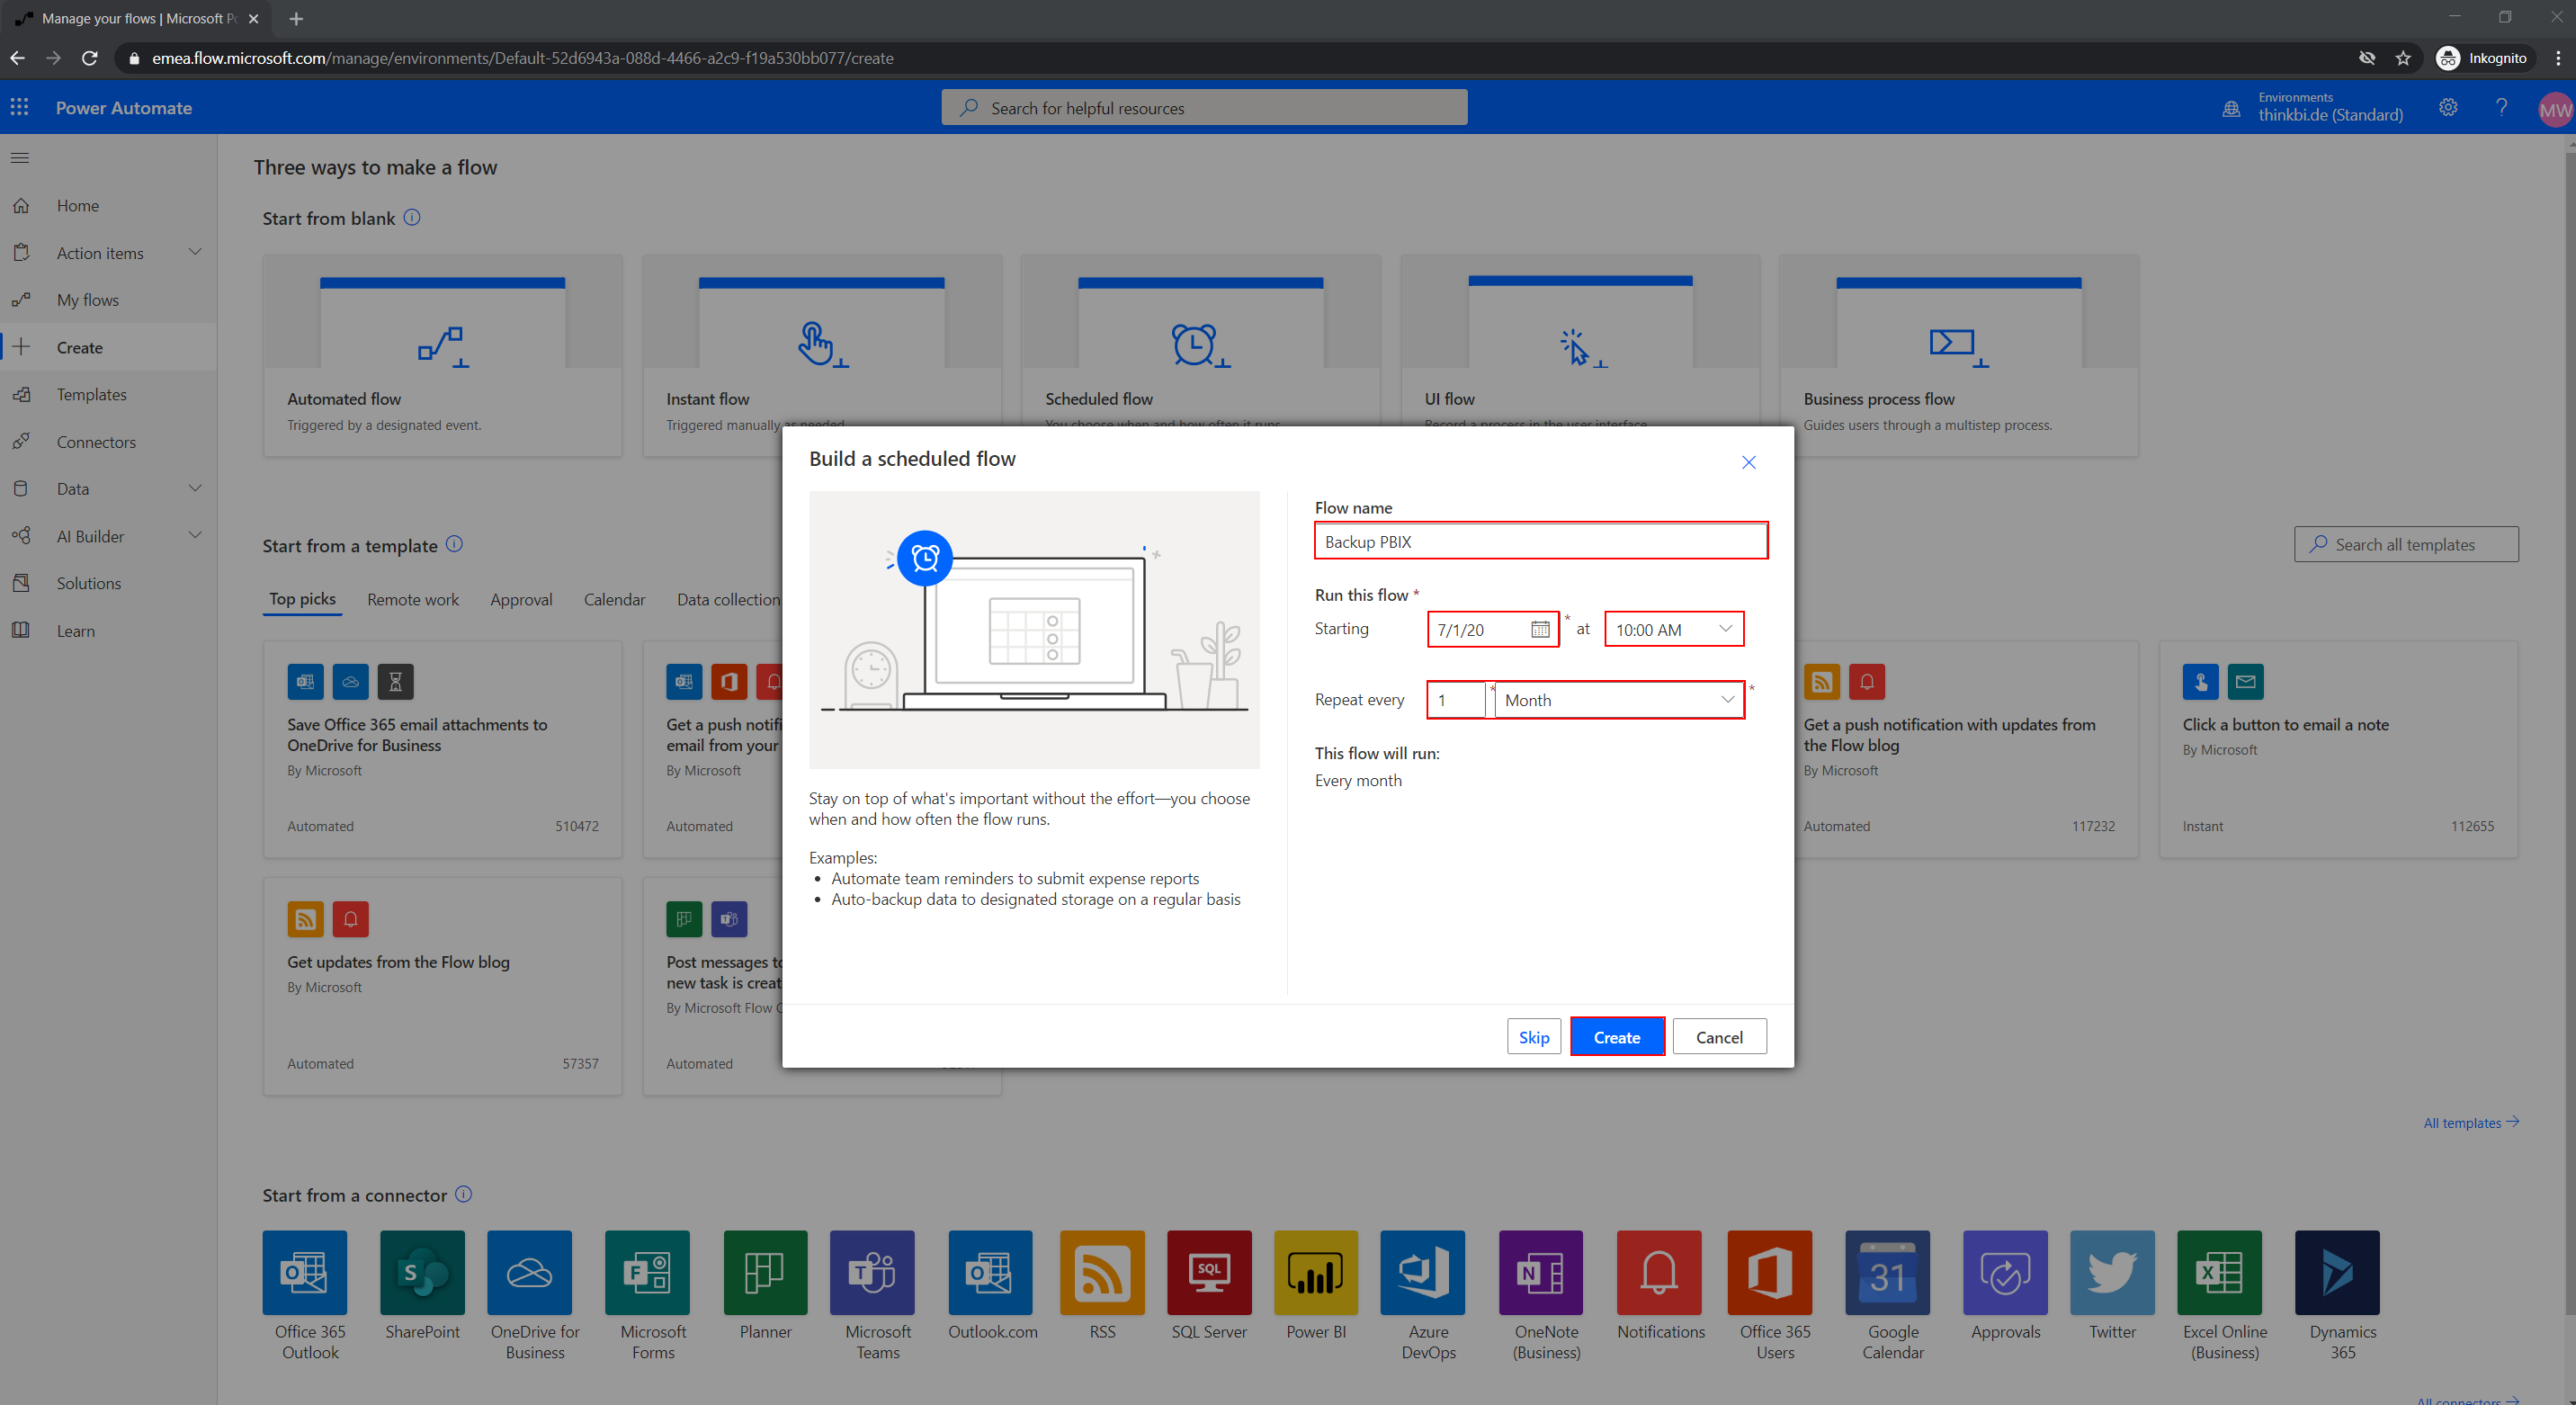
Give the flow a name and set up the schedule.
In the flow, the Custom Connector can now be used with all Power BI API calls.
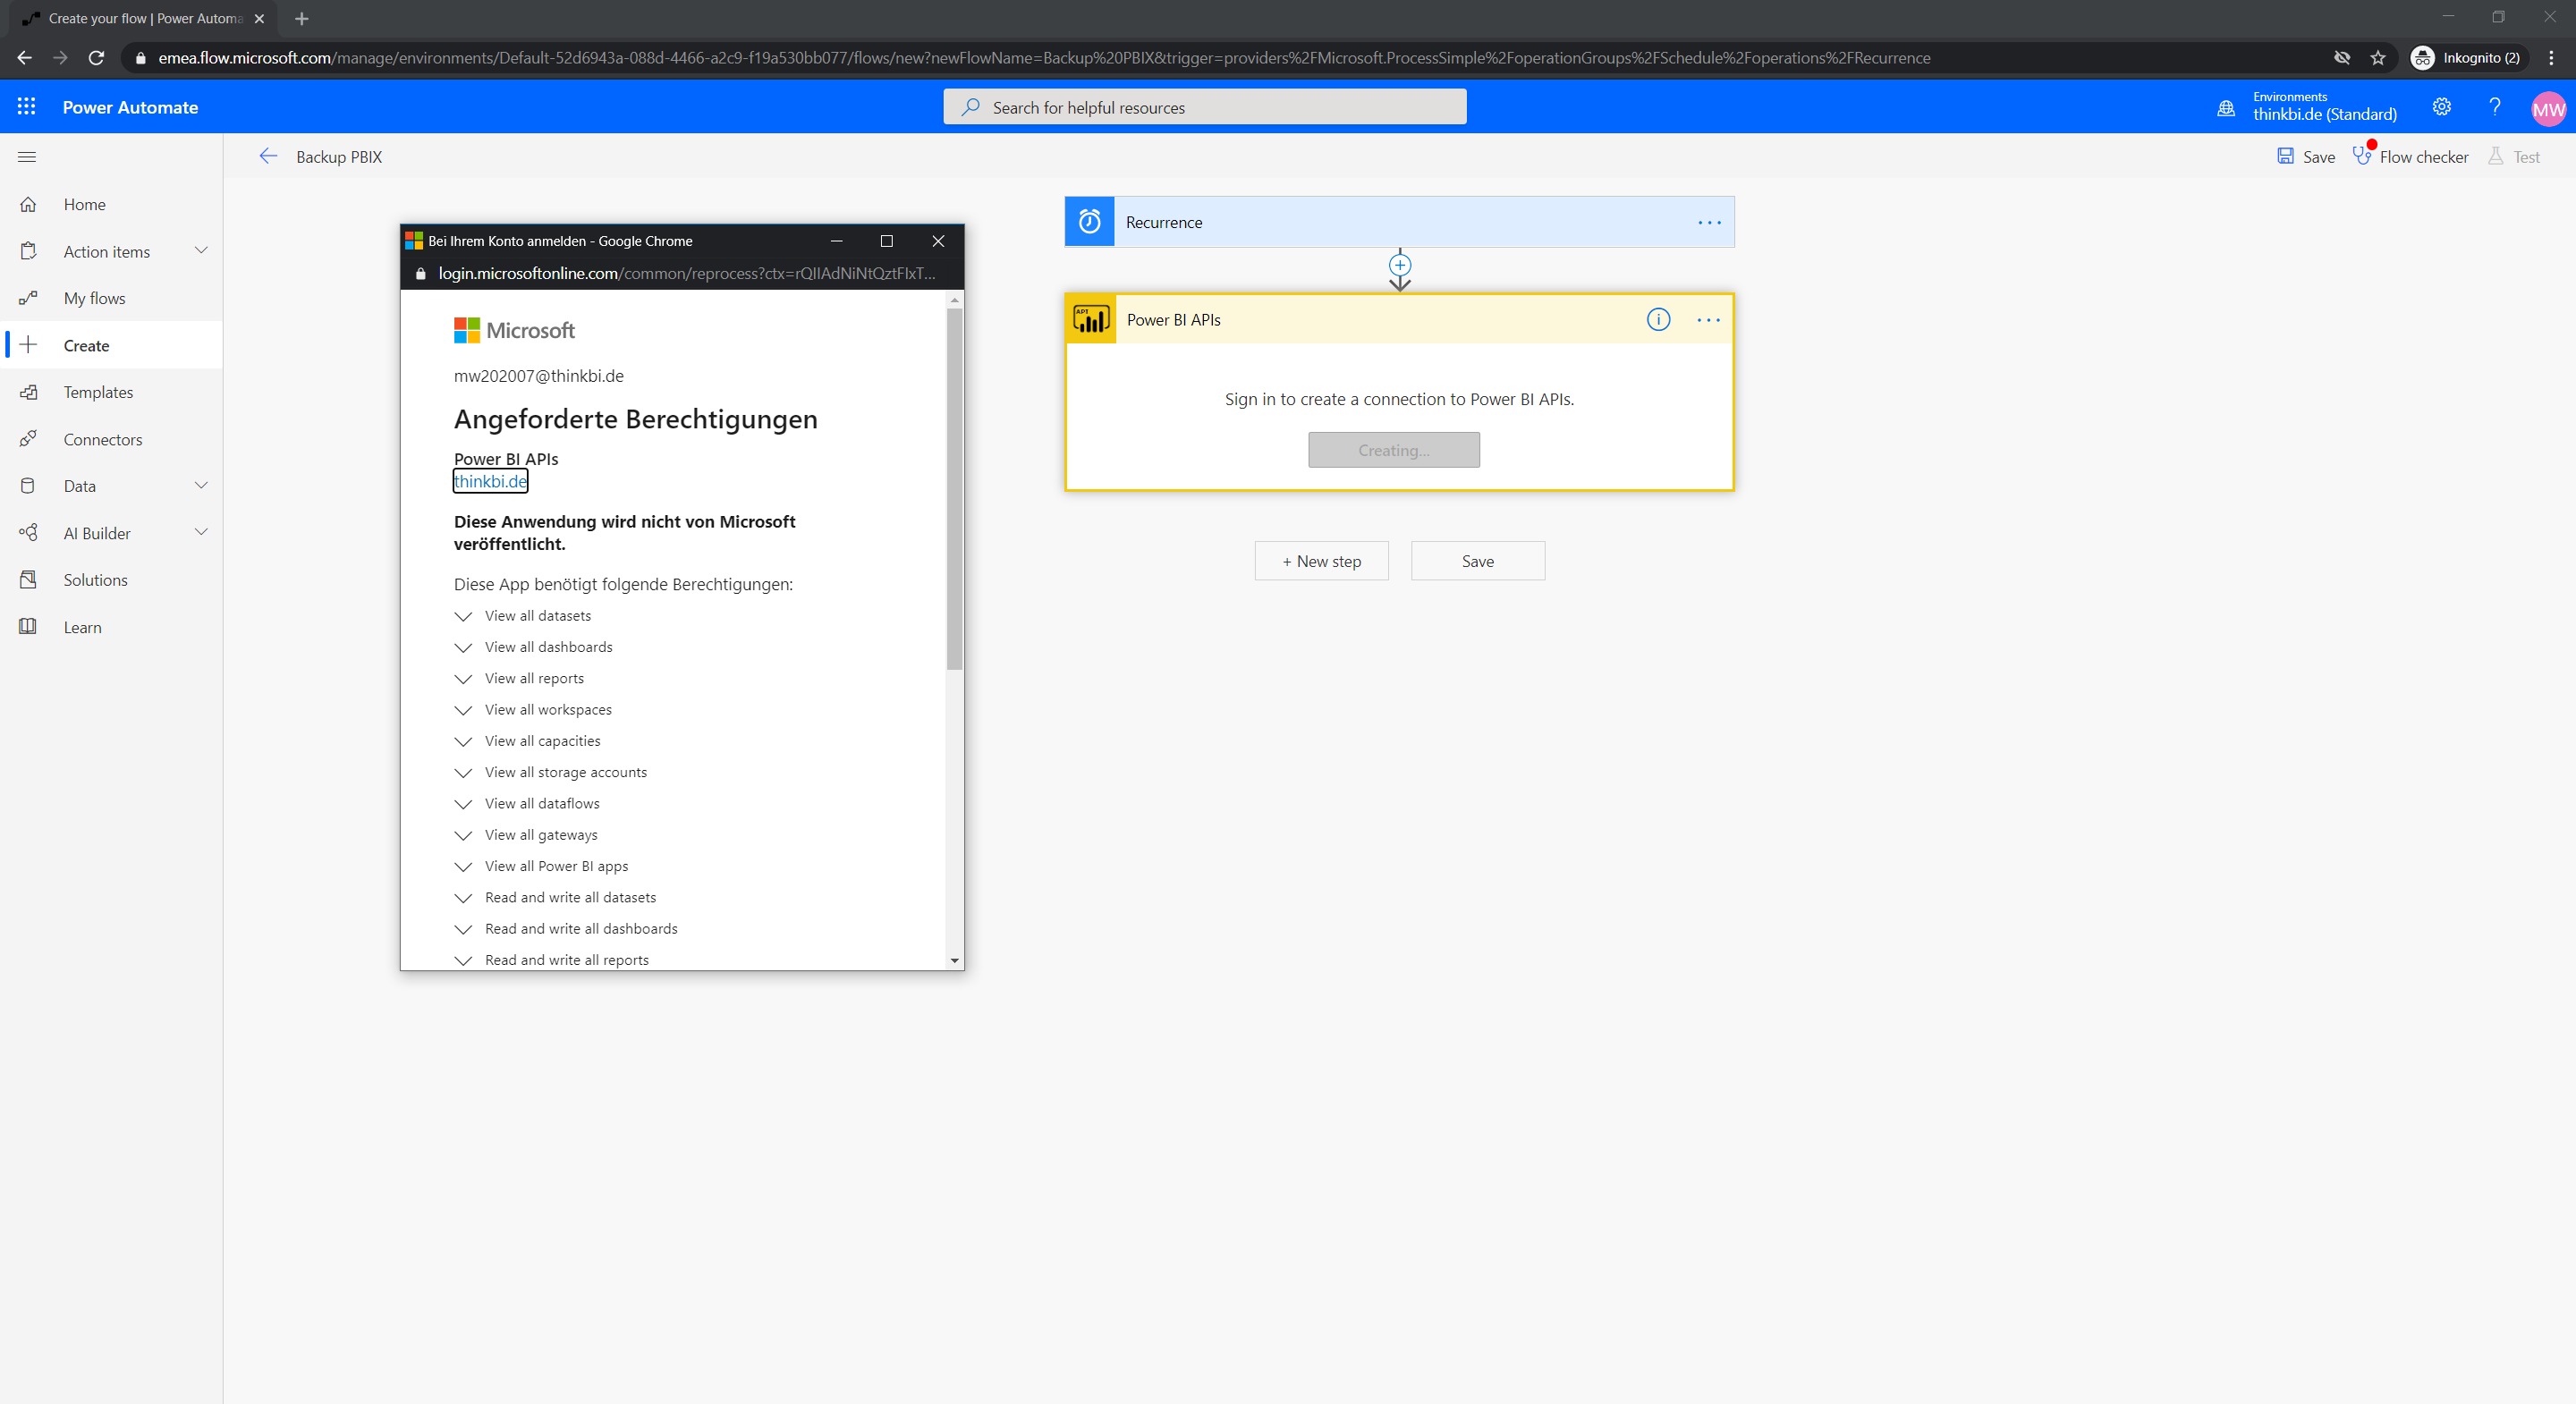
When you access for the first time, you must sign in and agree to the requested permissions.
You can then set up the following Power Automate Flow.
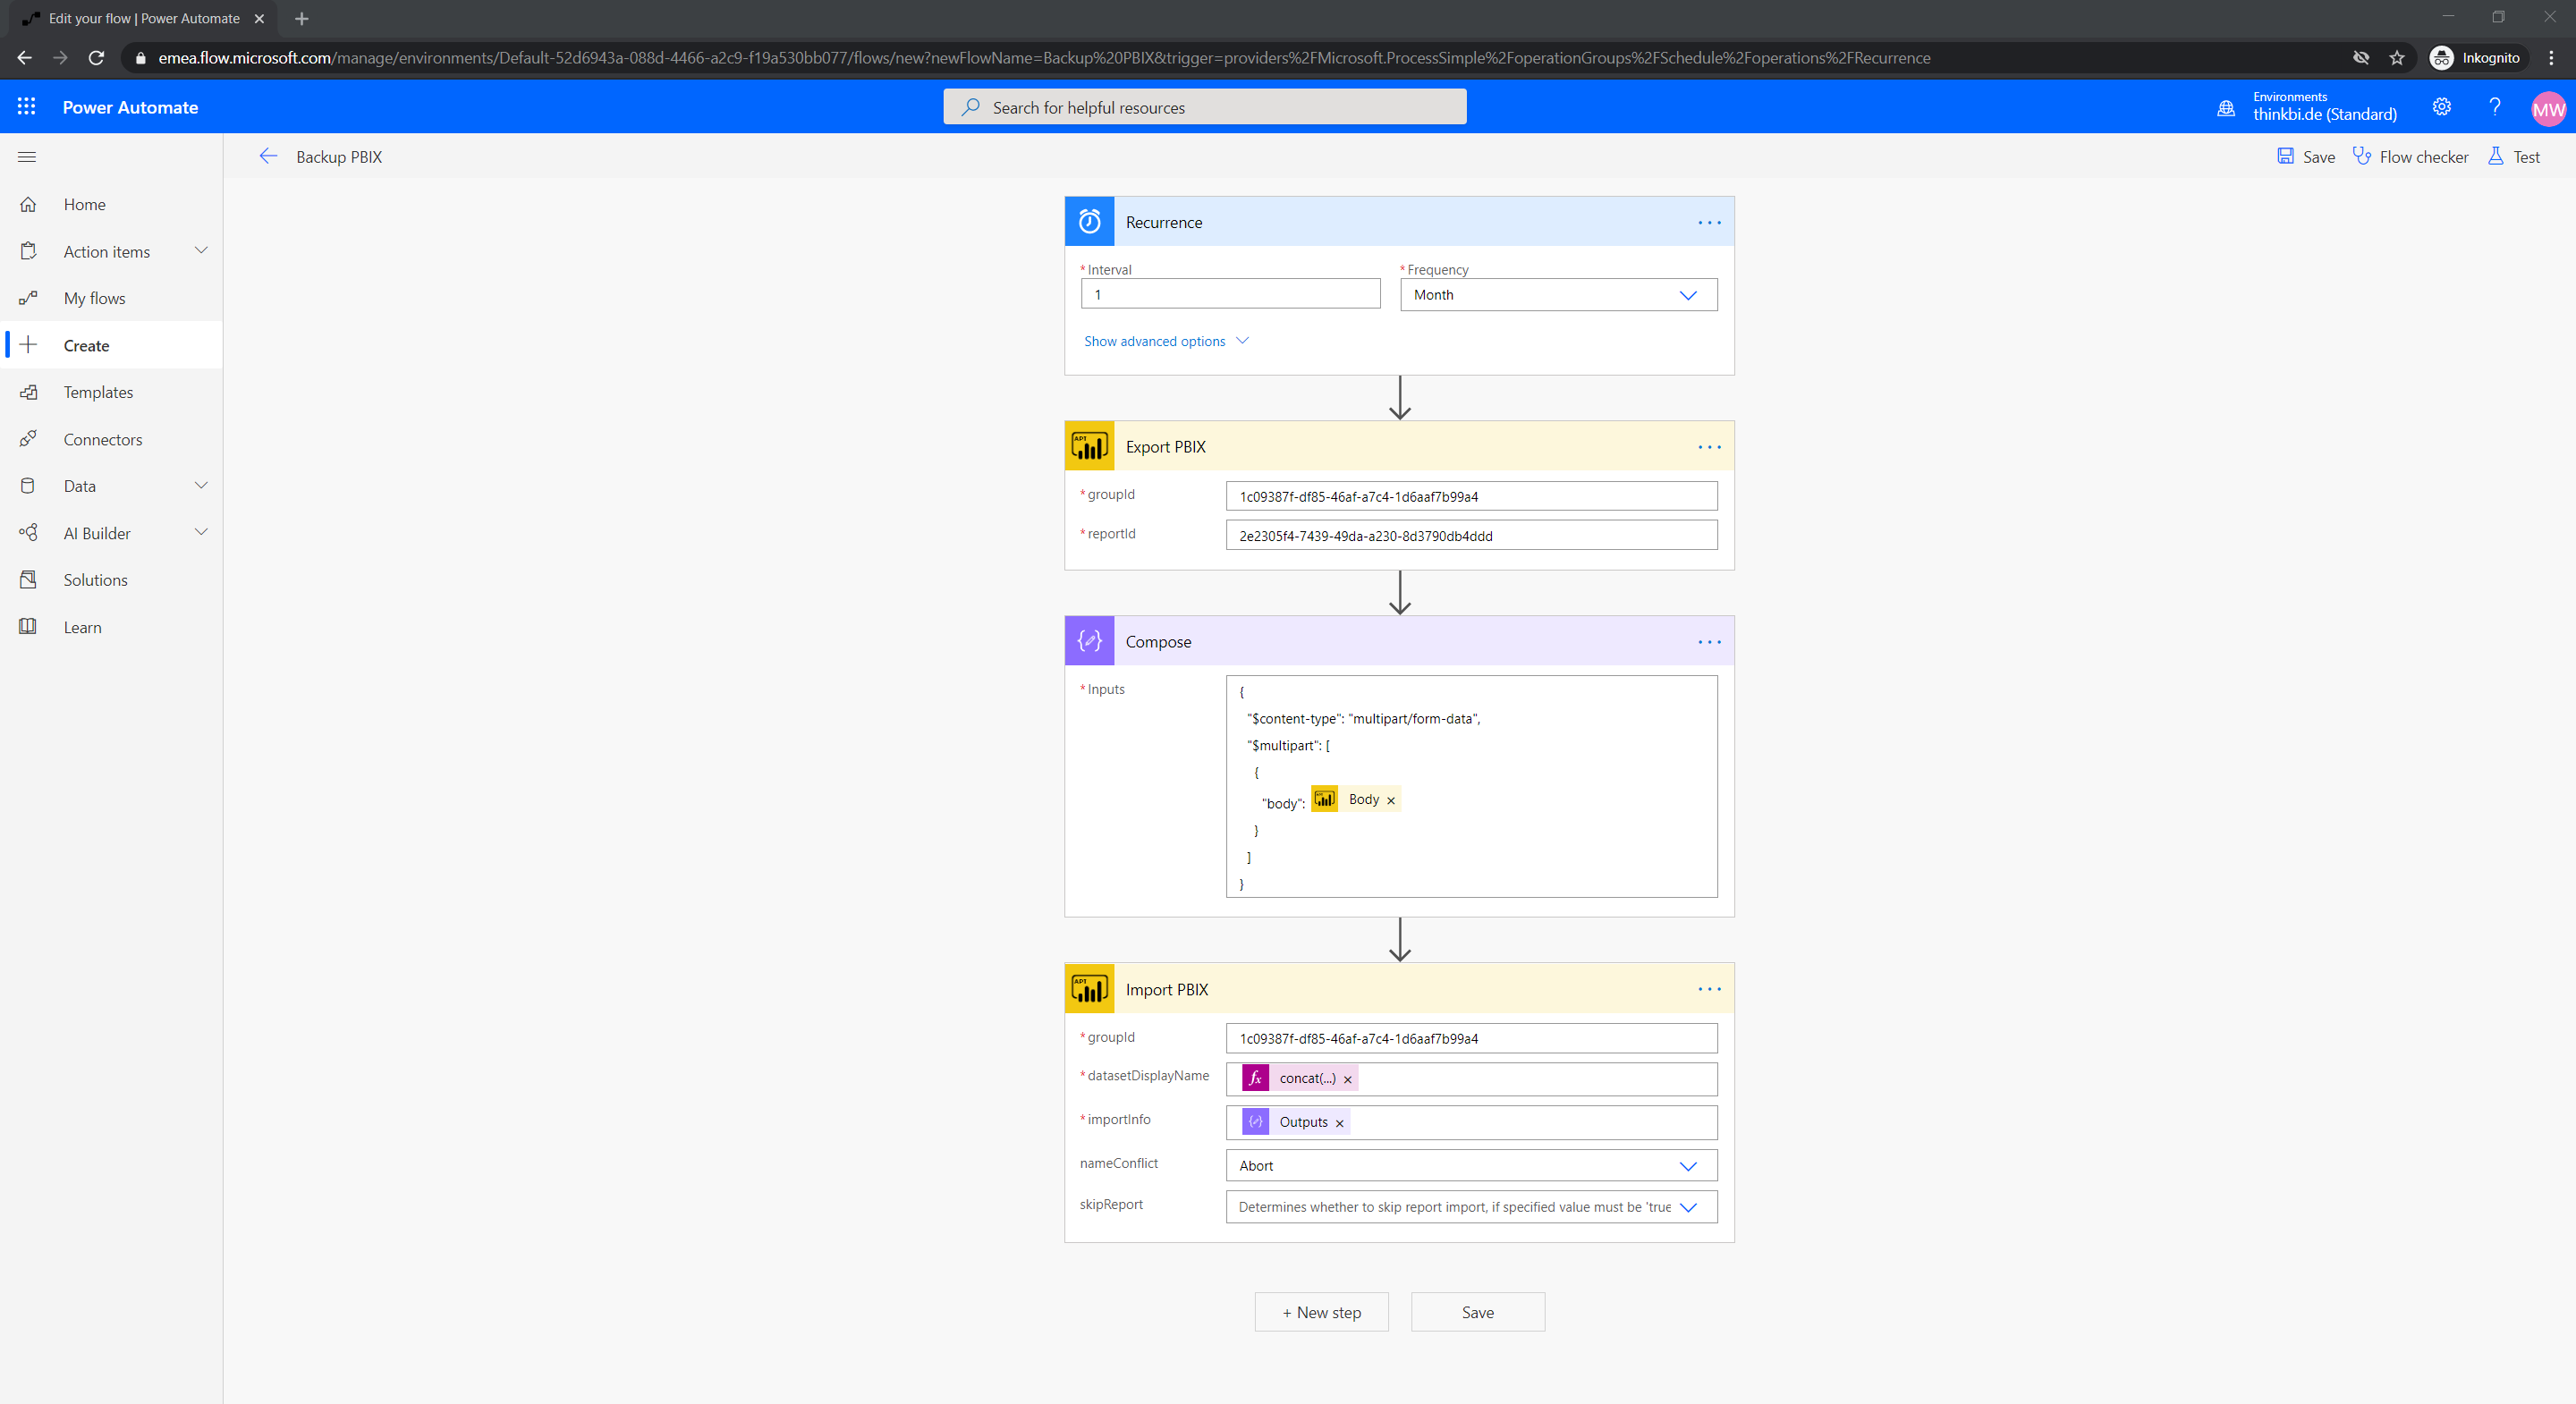
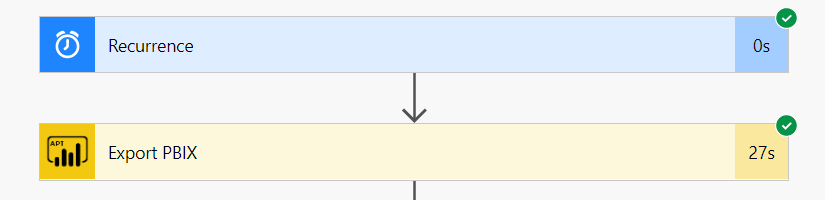
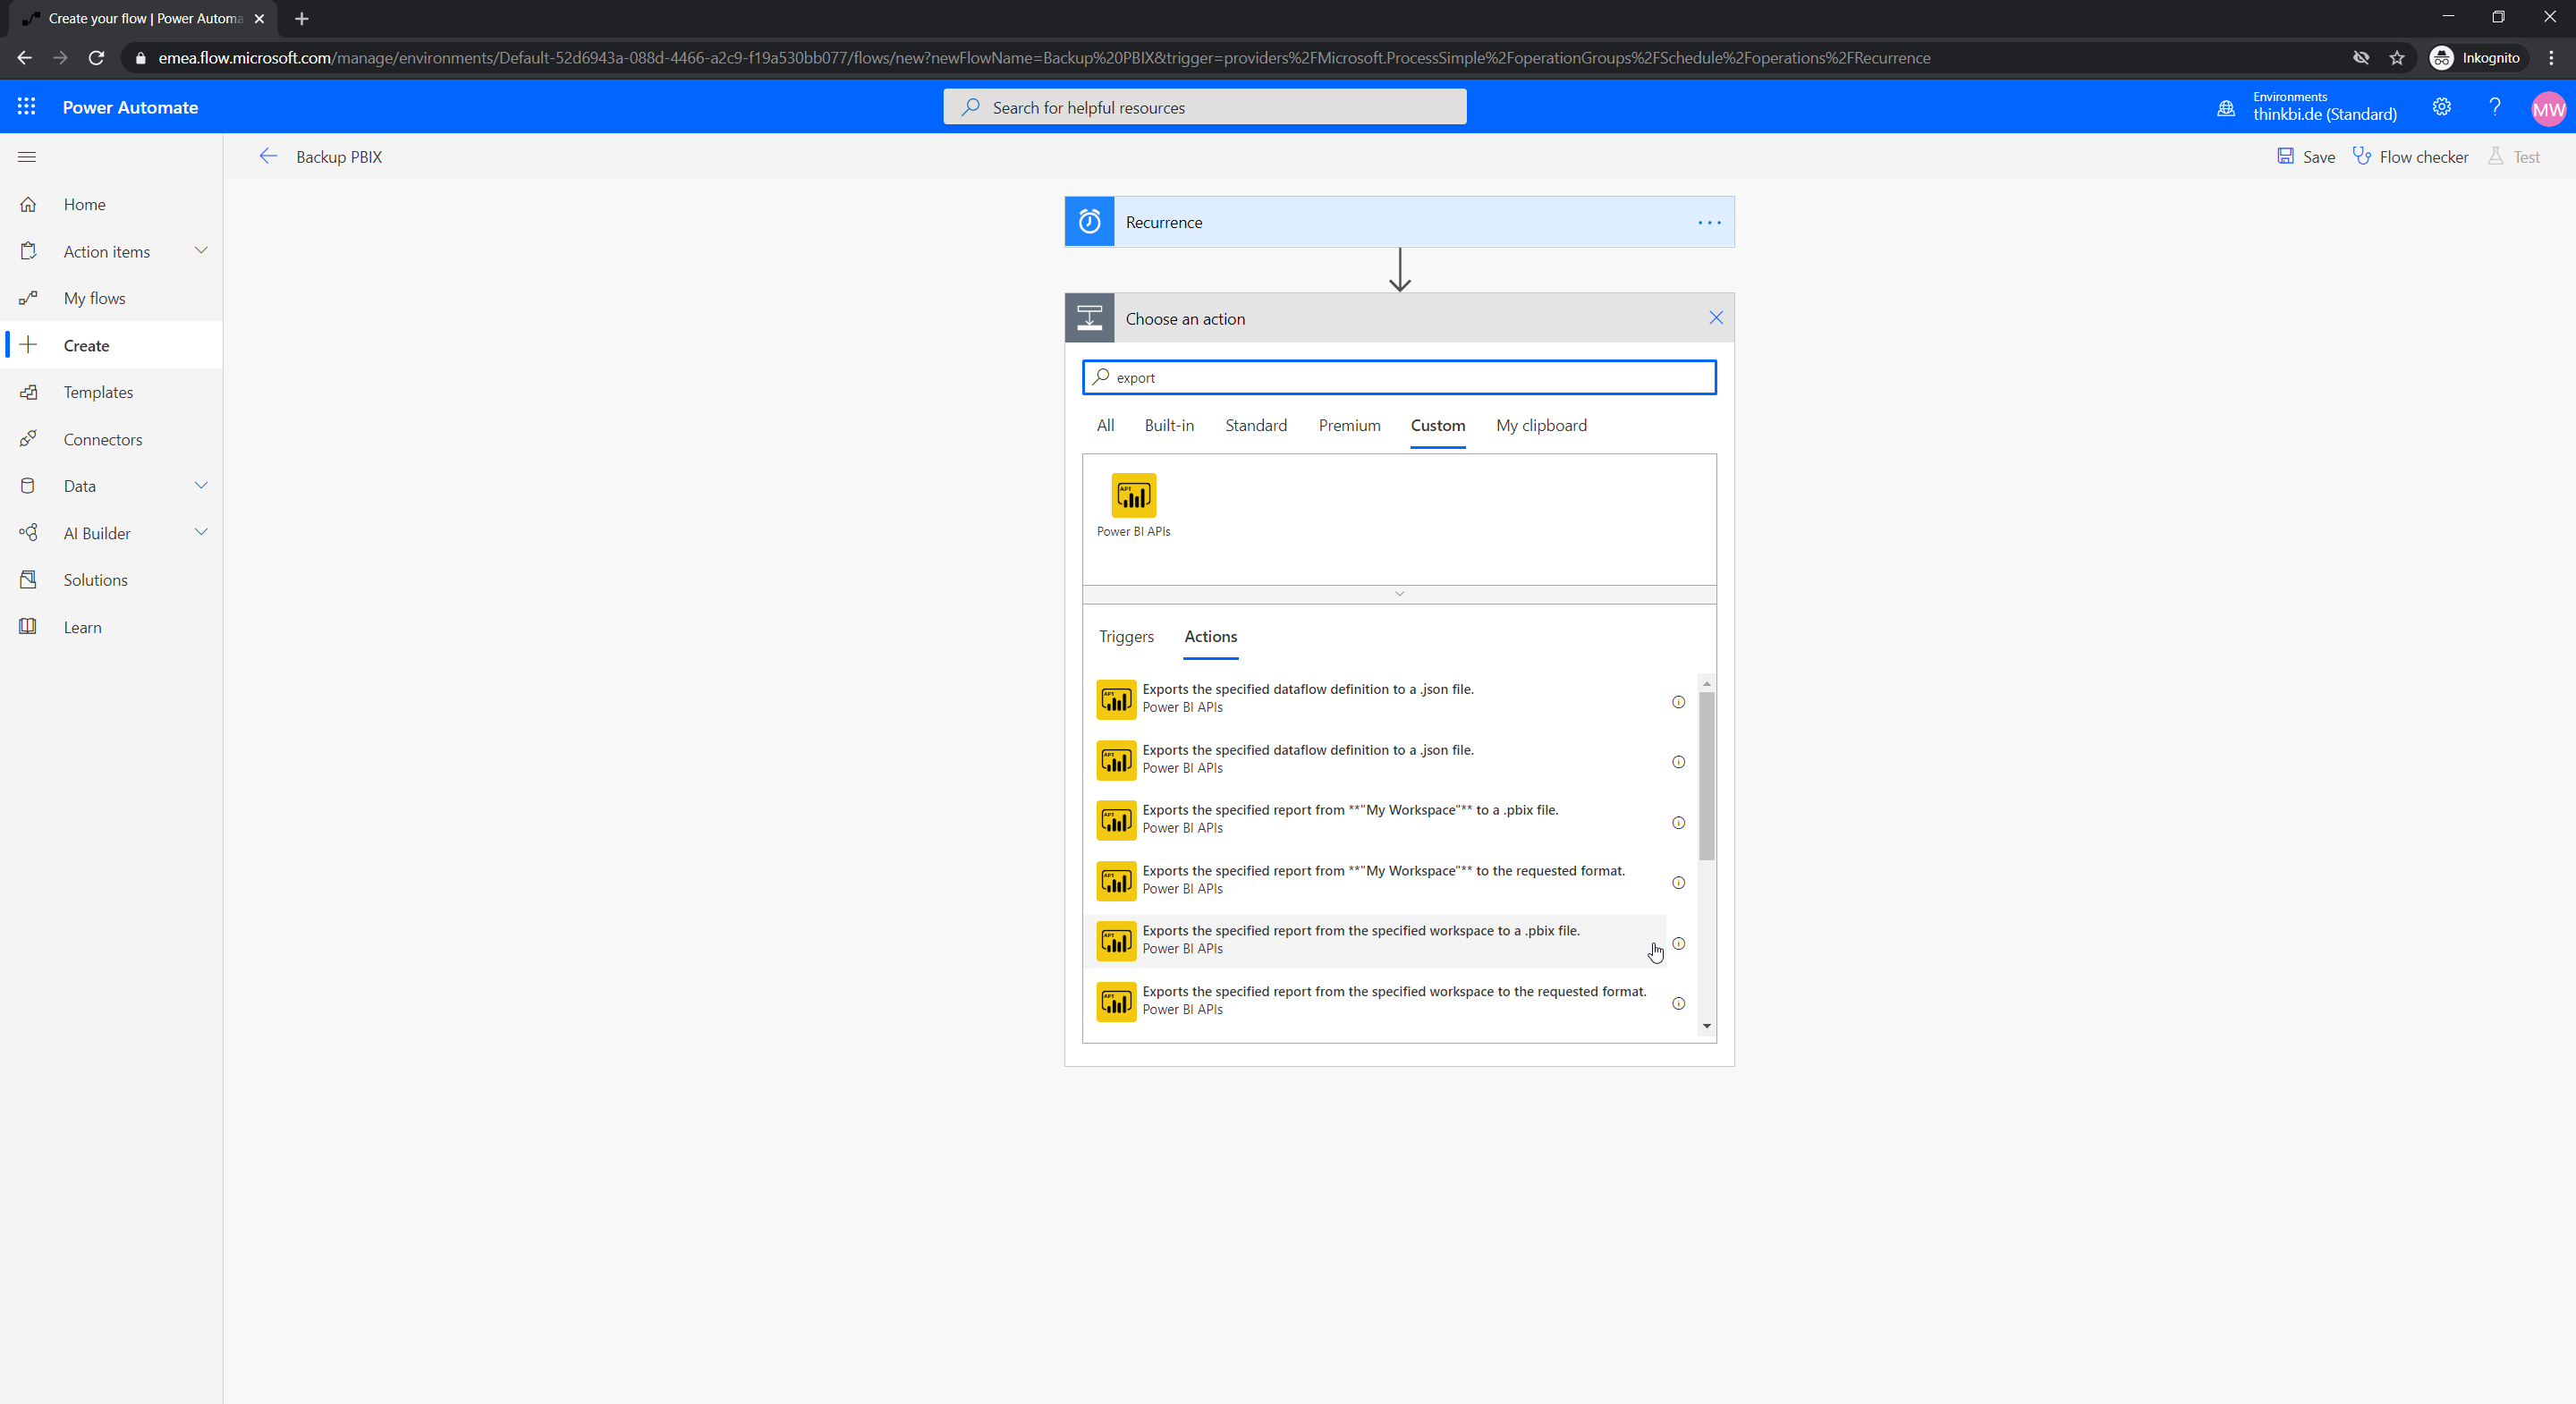
New Step: Export PBIX
Select the Custom Connector action “Exports the specified report from the specified workspace to a .pbix file.” and rename it “Export PBIX”.
- groupId: GUID of the source workspace
- reportId: GUID of the source report
New Step: Compose
Select the “Compose” action to convert the export body into the “multipart/form-data” structure required for the import.
- Inputs:
{
  "$content-type": "multipart/form-data",
  "$multipart": [
    {
      "body": @{body('Export_PBIX')}
    }
  ]
}
New Step: Import PBIX
Select the Custom Connector action “Creates new content on the specified workspace from .pbix, .json, Excel, Rdl, or file path in OneDrive for Business.” and rename it “Import PBIX”.
- groupId: GUID of the target workspace
- datasetDisplayName: Name of the PBIX file to be created, I use the following expression for this.
concat('DIAD ',
    formatDateTime(utcNow(),'yyyyMMdd') ,
    '.pbix')
- importInfo: The output of the previous Compose step is inserted here
- nameConflict: Abort
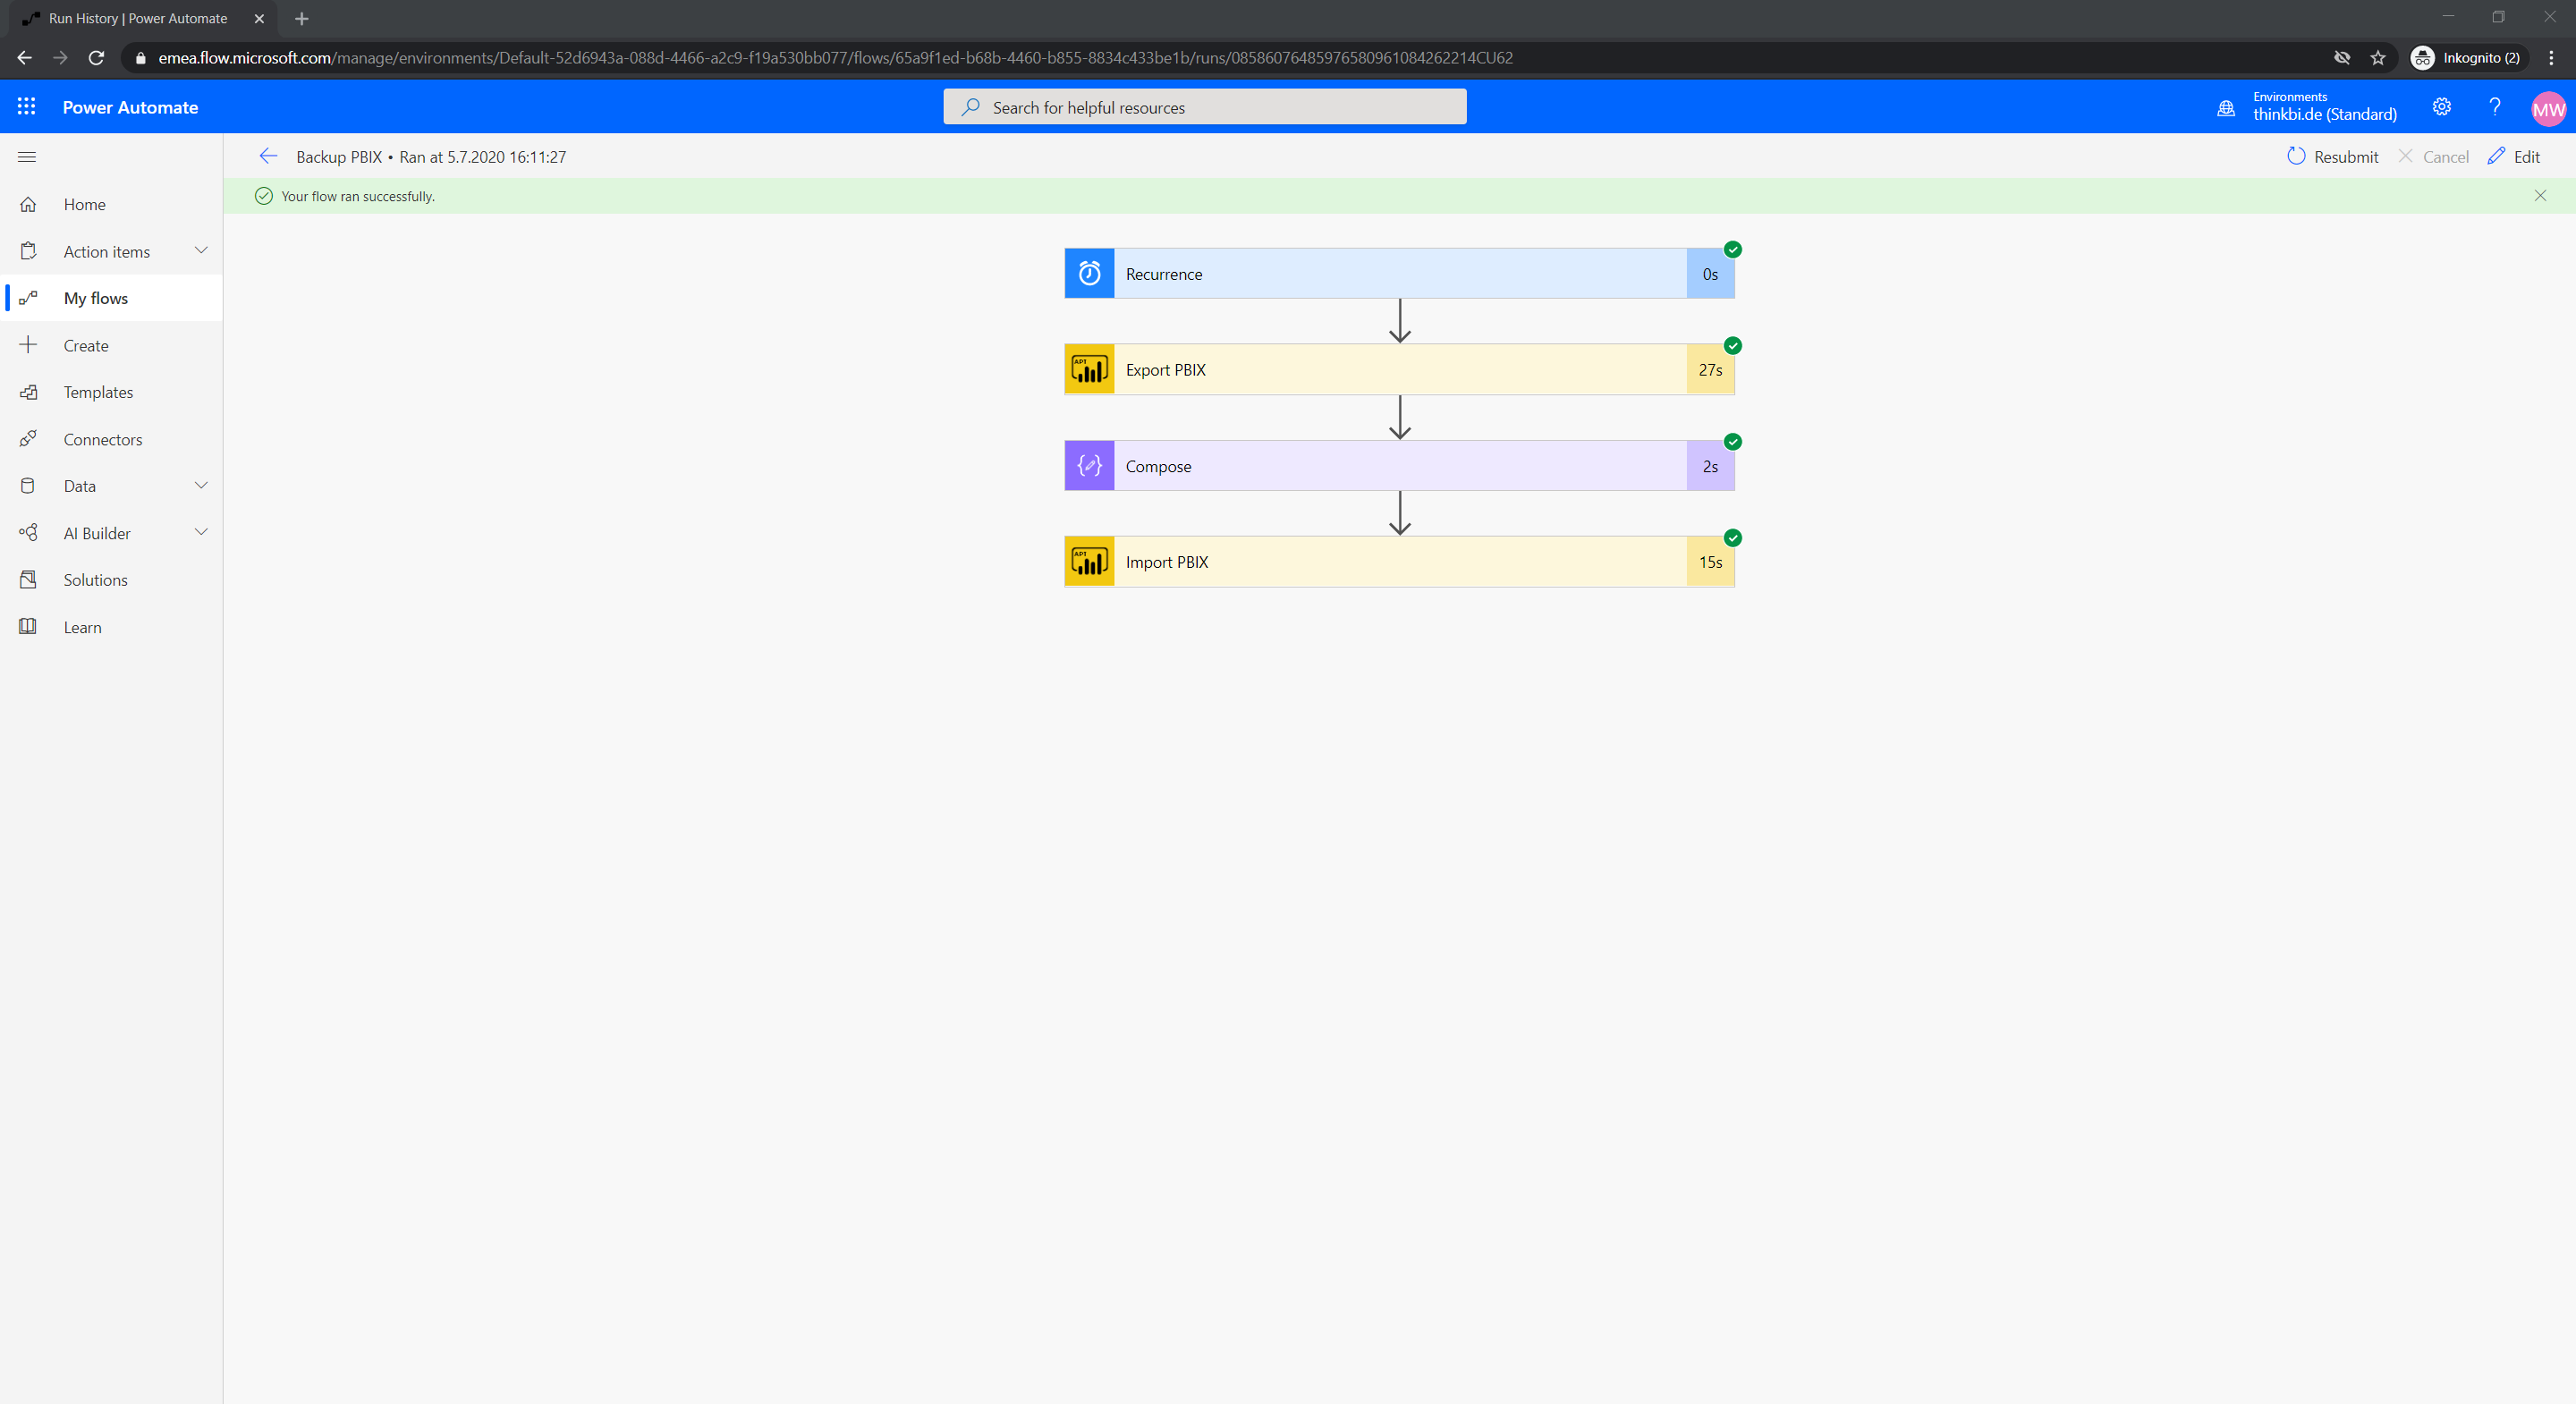
After creation, the Power Automate Flow can be tested.
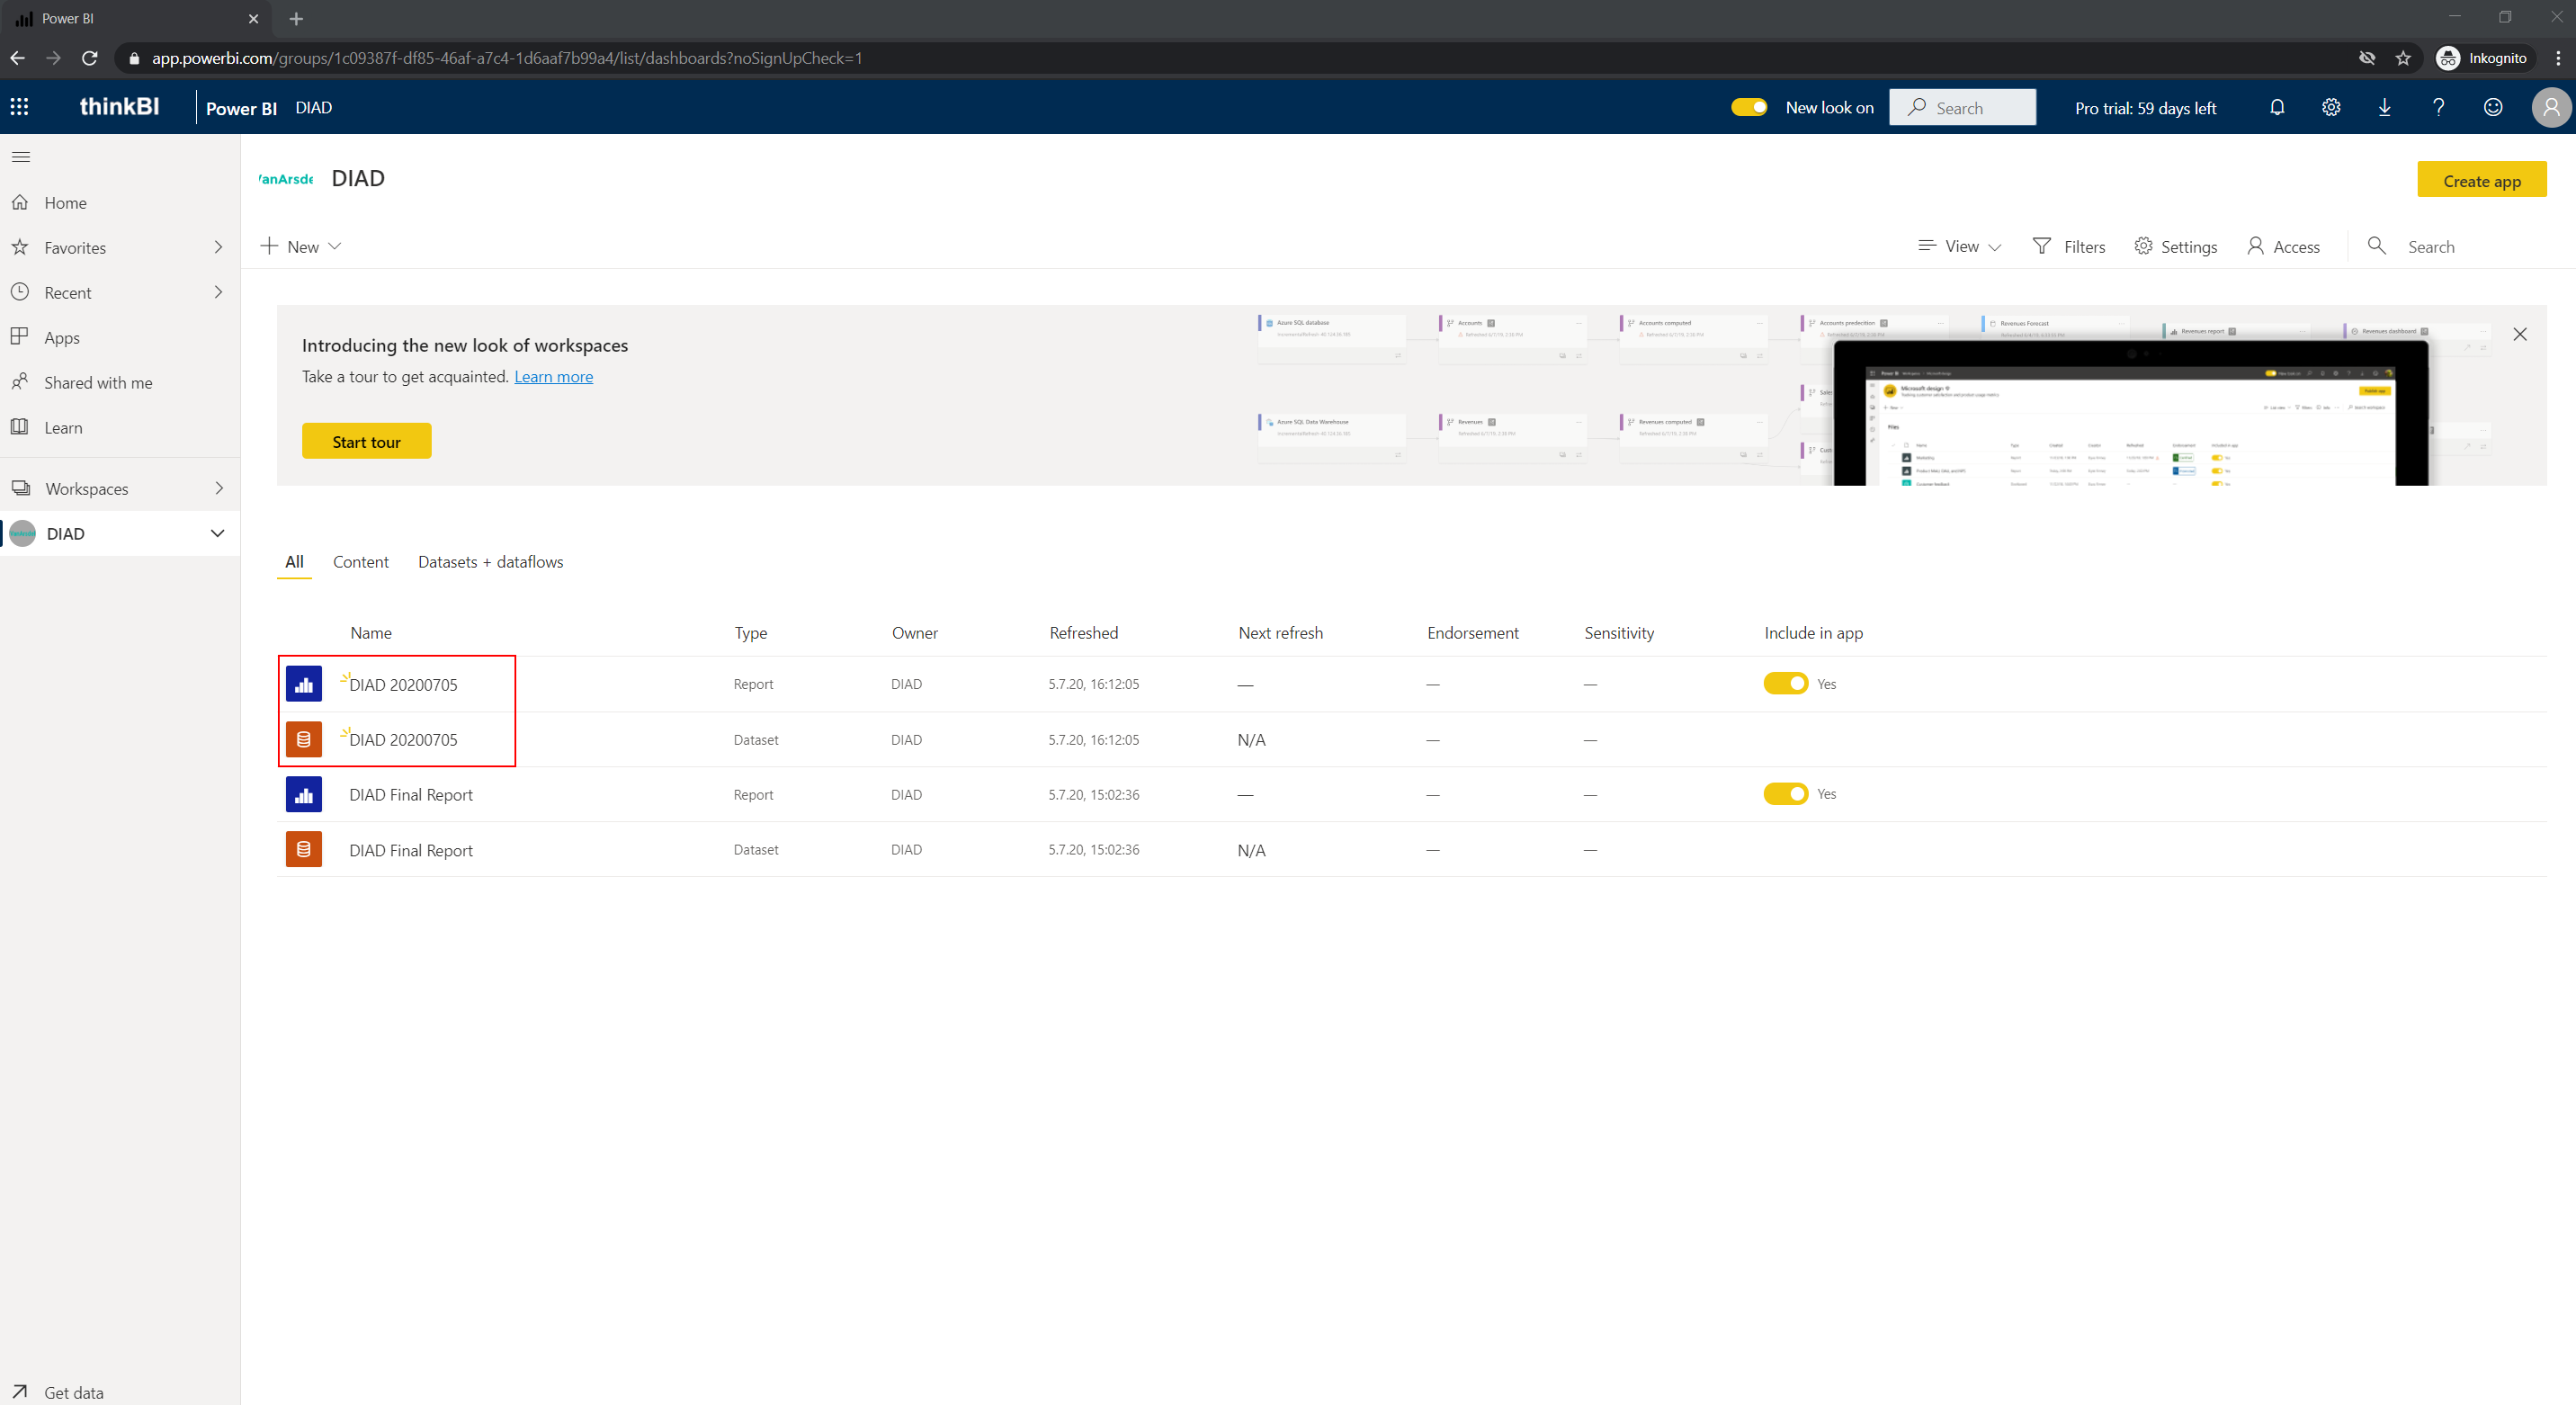
A look at the Power BI workspace shows that the copy of the report has been saved successfully.
And one last thing: Konstantinos & Chris mention in their posts, if you get a 404 error (or 403 error), just wait a few minutes.
Links:
- https://blog.crossjoin.co.uk/2018/10/19/calling-the-power-bi-rest-api-from-microsoft-flow-part-1-creating-a-flow-custom-connector/
- https://medium.com/@Konstantinos_Ioannou/refresh-powerbi-dataset-with-microsoft-flow-73836c727c33
- https://powerusers.microsoft.com/t5/Building-Flows/HTTP-Post-multipart-form-data/td-p/145181